DIY dryer repair

Posted by on April 11th, 2019  •  0 Comments  •  Full Article

Our twenty year old Kenmore Series 70 electric dryer stopped heating last night. It would run, but would only blow cold air. I found this dryer repair tutorial on youtube.

I was able to fix it the next day for $60 instead of the $200 it would have likely cost. I could have fixed it for $30 if I’d wanted to wait for shipping. But it gets used every day and we didn’t want to wait.

Danger! Be absolutely sure you disconnect the power from your dryer BEFORE you take it apart.


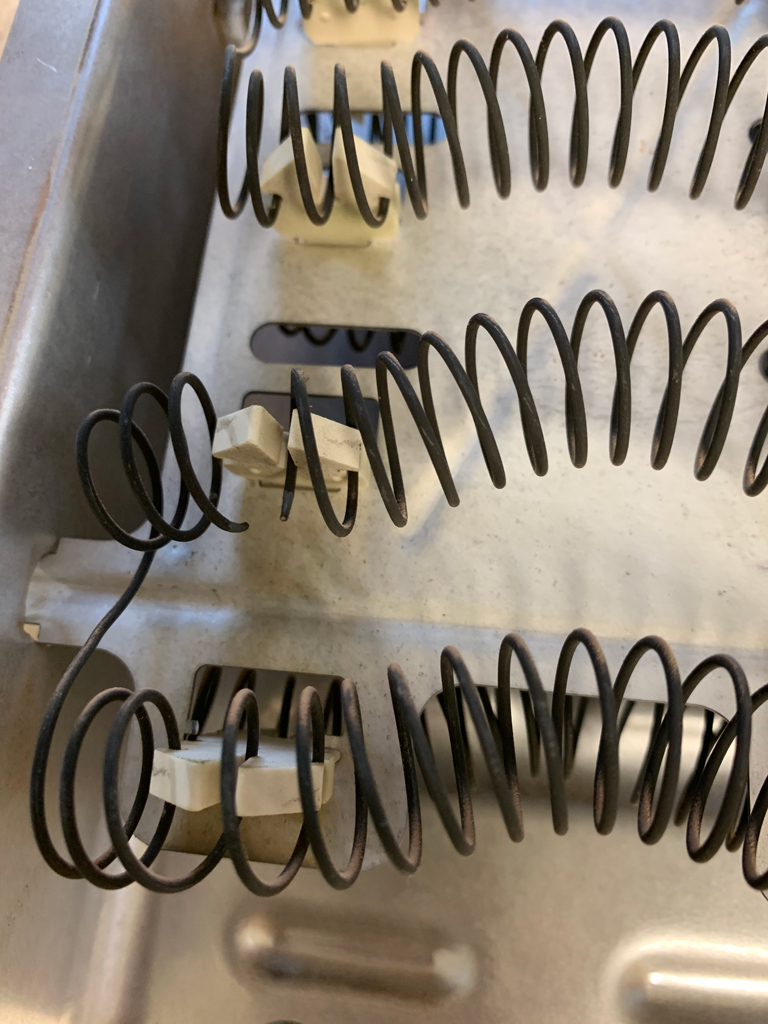
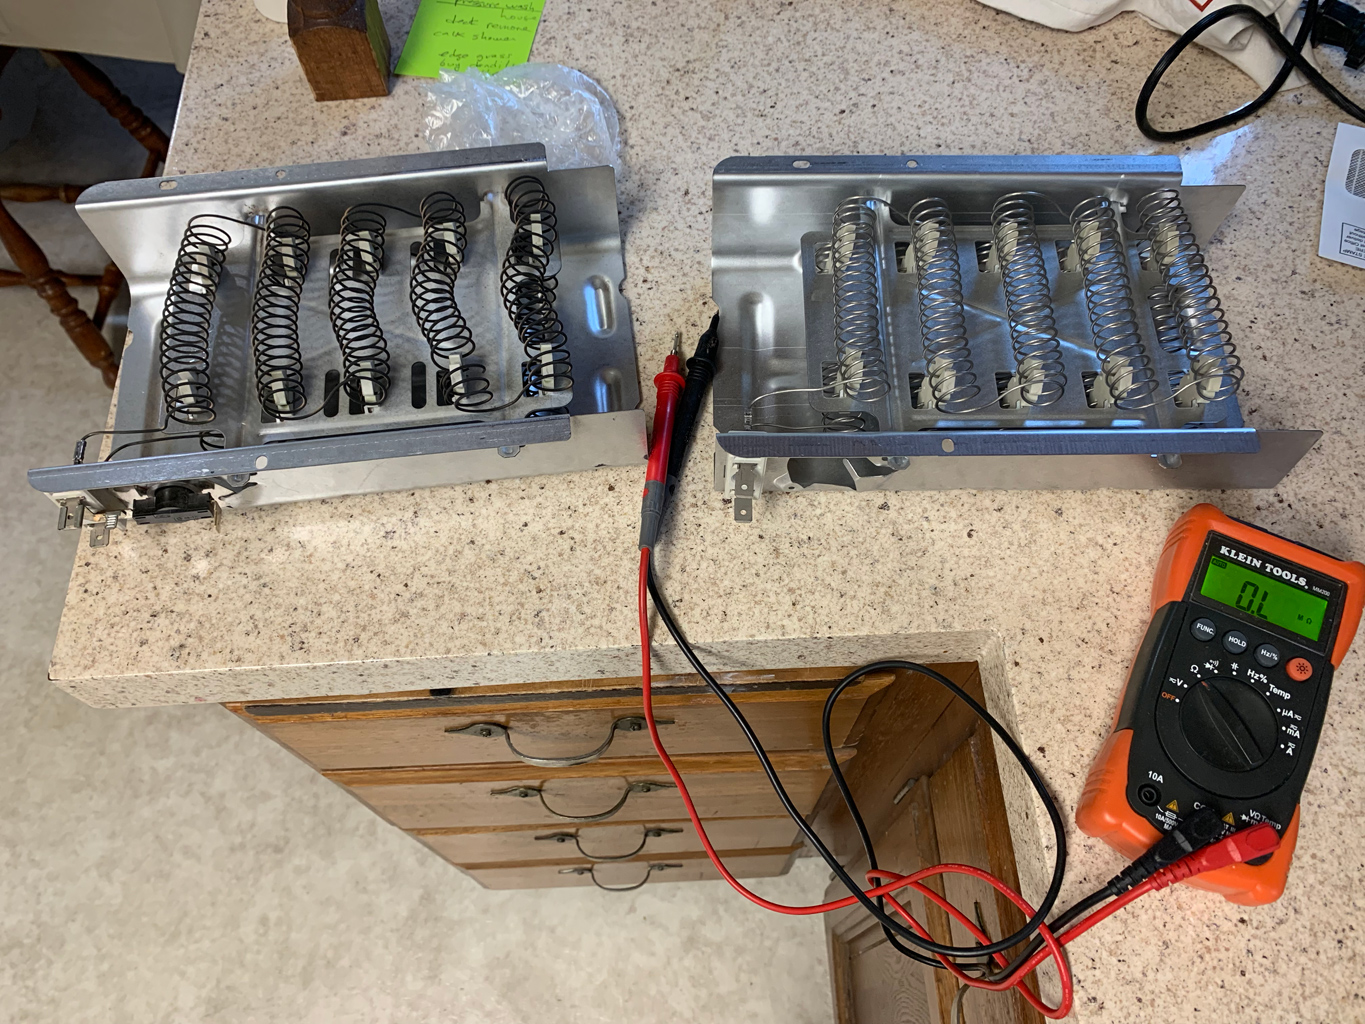
I worked through the steps with my multi-tester and found that the heater element was bad. He explains it better, but the basic idea is that your multimeter has a battery inside it. When you set it to ohms, it sends current through the connection prongs on the heater element. I think he said to look for 9 ohms of resistance? Anyway, this means that the current from the multimeter tries to ‘get through’ the coil of the element but runs into a load…or maybe it’s called resistance. Point is, if it’s good, the current can get all the way through to the other probe, completing the circuit…but with resistance, which is measured in ohms. If you see a zero on your ohm meter, it means the current can’t get through at all…and this means a bad heater element. I took it apart and sure enough, the coil was broken. Looked like a broken spring.

I called a local appliance store and they had a replacement coil in stock. Took me a few hours total time. That was fun work. I like fixing things.

FYI: I am not an electrician. My instructions may be wrong. The youtube guy knows his stuff. I’m just a guy who likes a challenge and frequently gets over his head. I told Sue it might electrocute us when we turned it on if I’d done something wrong. There is 220 volts in there. My saving grace was to take a lot of photos of how the wires were connected as I took it apart. Then I just reversed the process as I put it back together.

The only way I can see this going south is if one of the connectors pulled apart and short circuited to the frame. The push on connectors seem flimsy. I was temped to soder them tight but didn’t.

Phone case for climbing

Posted by on April 8th, 2019  •  0 Comments  •  Full Article

Many of my partners are leading with iPhones in their pants pocket. Considering what they cost, I shudder when I see them waving them around with abandon, trying to get the best angle. They do this 6 pitches up in the air…which amounts to a 600 foot drop if something goes wrong.

If the route is too hard I will leave my big camera on the ground or in the car. I have a small camera…but we often bring an iPhone for  emergencies…worst case scenarios. And considering how good they are getting, it’s tempting to jump on the bandwagon. But my phone is too big for a pants pocket, and it has a stupid glass back…so it’s fragile.

I already have a metal fronted case, but there is only one bungy snap holding the phone in the case, and the glass side is pressed up against my harness, only protected by the inner plastic case. I considered buying a hardish soft shell case with a zipper, which I have for my point and shoot camera, but I don’t like zippers…hate them with a passion actually. Every zipper is on its way to breaking…it’s only a matter of time.

I wondered if I could make a user repairable, bombproof metal iPhone case.  Yes, it turns out I can.

I started with some concept drawings. I hadn’t really thought it through…but figured if I started working all would become clear. I’m also blocked right now, I wiped off my latest painting…so I needed some entertainment on my four day weekend.

concept drawing

concept drawing

Bending the aluminum was hard because it was wider than my vise. I had to use some 1/4″ iron to extend my vise. I was able to make my right angle bends using this jig and a sledge hammer.

hammering the right angle bend

hammering the right angle bend

partially bent right angle

partially bent right angle

bending jig

bending jig

both angles bent

both angles bent

After that I sewed it together on the bottom with 1/8″ bungy cord. I considered using a hinge, but the bungy cord added cushion and avoided the case having to be overly precise regarding thickness of the phone.

My initial plan was to have the biner seal the case, like the way a binier locks down a grigri. But it turns out that a binier has such a wide bottom that the case is not held closed. I found a way to use a threaded bungy to lock the case closed, supplementing the biner. Getting all that sorted out and debugged took most of a day. Then I showed it to Sue and Clint and they both thought it was stupid…overkill was the term they used. While I think they are right, it was still a fun exercise in the art of inventing. The fact that my invention was mis-guided is irrelevant.

One of the problems I solved in my mis-guided train wreck of an invention was that the 0.040″ aluminum  was too flimsy to make a good carabinier hangar. I glued on a double layer of metal there. This is version 1.0 after all. It’s not supposed to be perfect. I’m thinking I can hang this on my rack or harness next to cams and quick draws and it will be fine.