Adding a logo in a WordPress custom theme
Posted by markhwebster on March 13th, 2017 • 0 Comments
Add a logo image function to your custom theme
Geek alert! This post is for the students in my WordPress class. There is nothing here worth reading if you are looking for stories about climbing or painting.
I needed to create one more lesson to finish out the quarter. My choices for creating the content of the lesson were: inDesign, Canvas, HTML, Word or a youtube video via Camtashia. I settled on WordPress because it seemed the easiest and most durable platform. Plus I’ve learned a lot online from other authors, and this is a way for me to give back.
Lesson 4, Final
We stopped here last week on our custom theme. We’ve got a right hand sidebar, but no images in header:
********
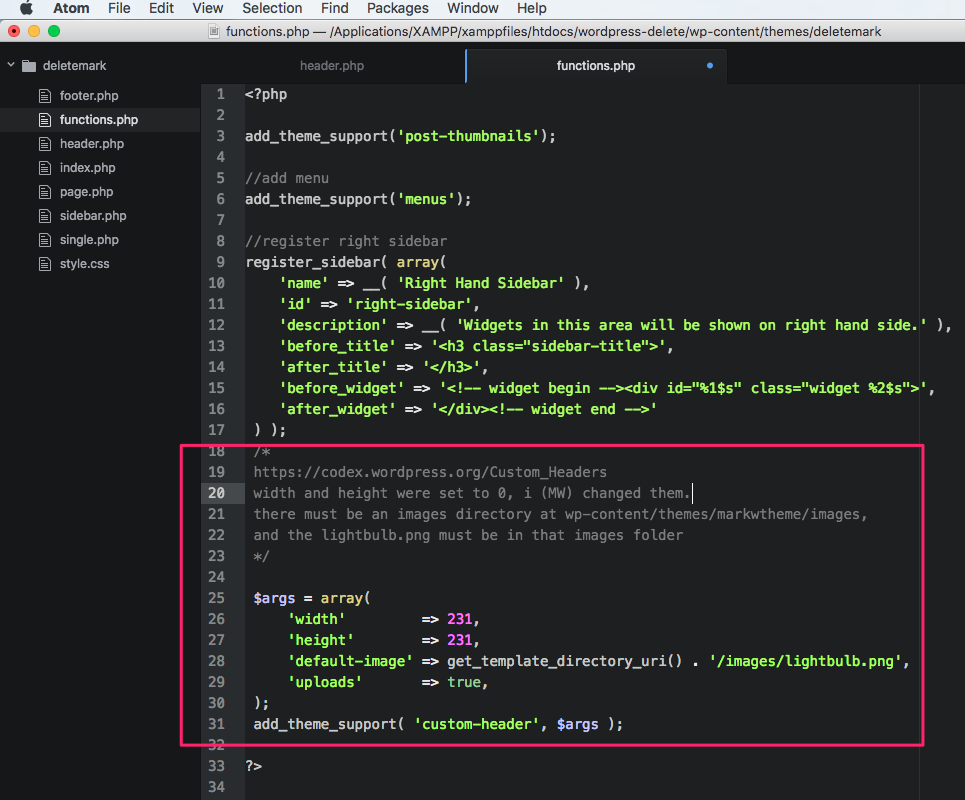
(2.) Add this code into your functions.php file. Place it after the last function which was: register_sidebar(array(…)) but before the closing ?> php tag. Note, you can read much more about this custom-header function here: https://codex.wordpress.org/Custom_Headers
Here is the code:
$args = array(
     'width'         => 231,
     'height'        => 231,
     'default-image' => get_template_directory_uri() . '/images/lightbulb.png',
     'uploads'       => true,
);
add_theme_support( 'custom-header', $args );
Here is the new code in context:
<body id="home">
<div id="wrapper">
     <header class="masthead" style="background: url(<?php header_image(); ?>) top left no-repeat;">
          <h1><?php bloginfo('name'); ?></h1>
     </header>
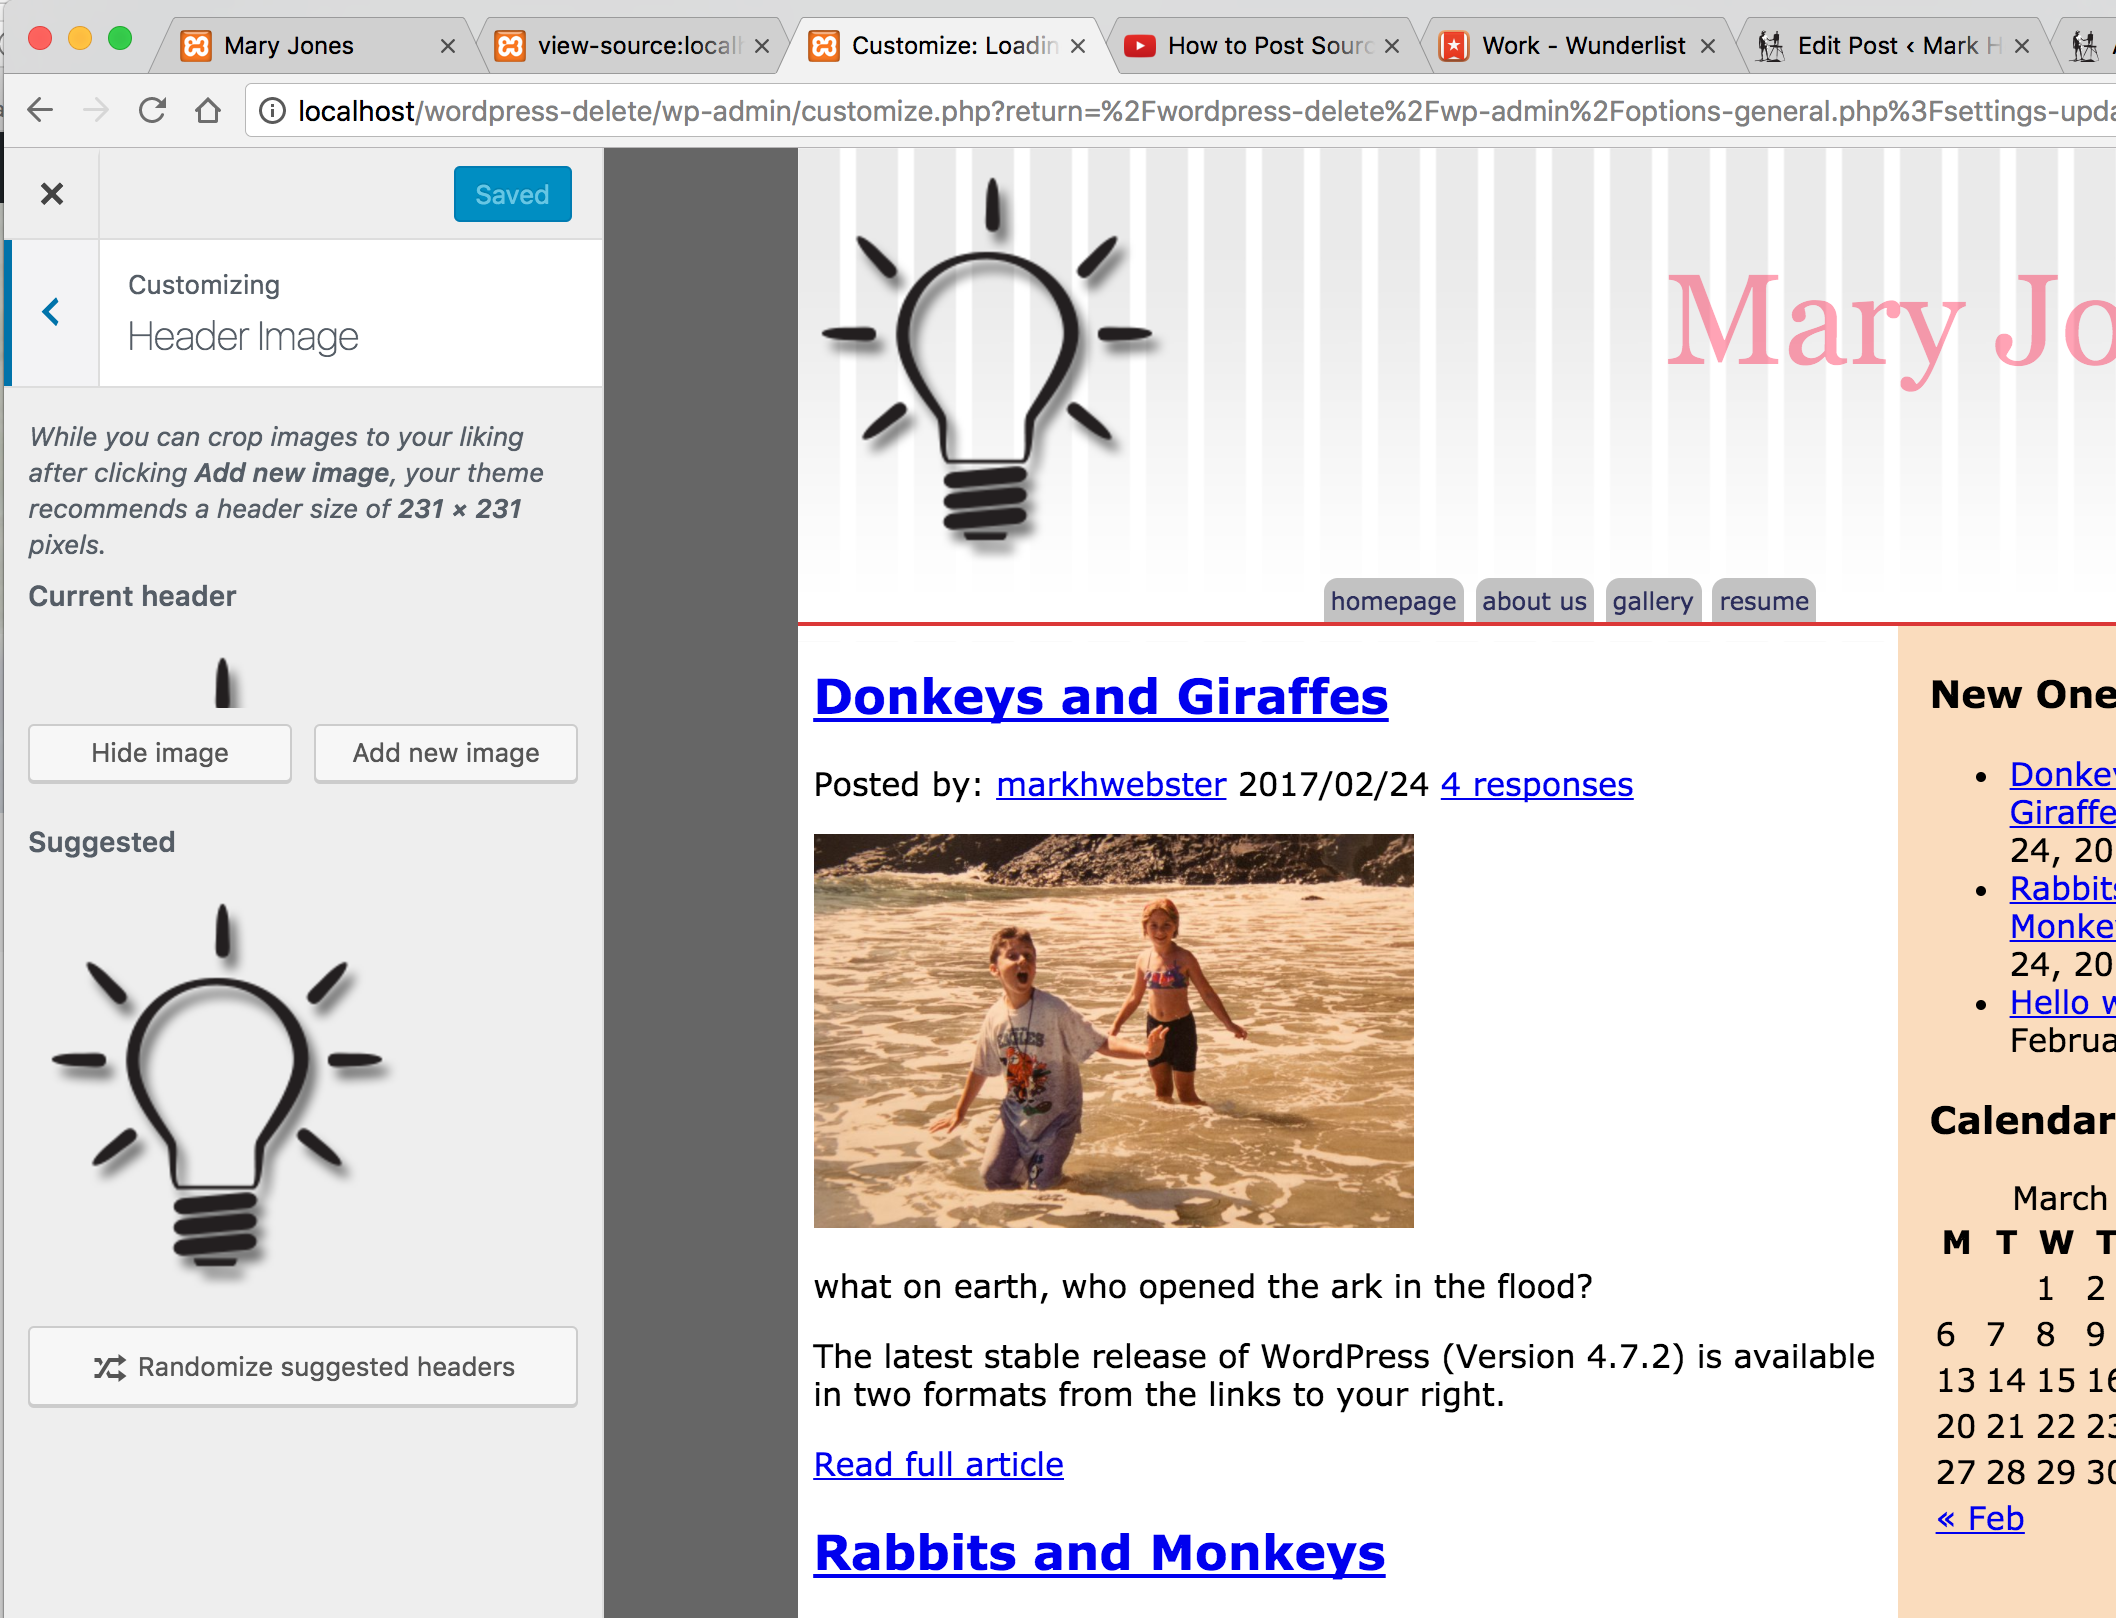
You should see the image appear as shown below.
NOTE: Behind the scenes, WordPress creates an association between custom-header, and header_image(). I have no idea how or where that happens, but you could google it for an answer.
If it doesn’t work…
********
(3-a.) View the source code of the webpage. Scroll down to the <header> tag and examine the style=”background: url();” property. Note how it is no longer a <?php ?> value. Now the url() declaration is an absolute address that leads from the root of the website down to the lightbulb.png So, if your logo image isn’t showing up, examine the images folder. Is it in there? Does it have a different name? If the site has crashed, or the url(); doesn’t look like the code below, try to find some logic in the error messages. PHP usually gives file names and code line numbers when it crashes. Examine those and compare your code to my code here, or in the finished theme I gave you in the resources folder.
<body id="home">
<div id="wrapper">
	<header class="masthead" style="background: url(http://localhost/wordpress-delete/wp-content/themes/deletemark/images/lightbulb.png) top left no-repeat;">
		<h1>Mary Jones</h1>
	</header>
	<nav class="main-menu">
You may notice that the tiling background image has also suddenly appeared. That is because we have an existing style sheet rule in our style.css that tells headerPinstripe.png to appear from the images folder.
#wrapper {
	margin-right: auto;
	margin-left: auto;
	padding: 0;
	width: 80%;
    background: #fff url(images/headerPinstripe.png) top left repeat-x;
	max-width: 1400px;
	background-color: #fff;

	border-bottom-right-radius: 18px;
	border-bottom-left-radius: 17px;
	-webkit-box-shadow: 7px 7px 5px 0px rgba(50, 50, 50, 0.75);
	-moz-box-shadow:    7px 7px 5px 0px rgba(50, 50, 50, 0.75);
	box-shadow:         7px 7px 5px 0px rgba(50, 50, 50, 0.75);
}
Even though we are developing this at http://localhost/customtheme, we don’t have to go through the entire Duplicator zipping, upload and install process to get these changes online into your live WordPress installation.


