Sue, Lisa and I skied Paradise last Sunday. Snow was breakable crust on our first run taking Sue back to the car. Then Lisa and I skinned back up to base of Pan and dropped over the side to the east where it was more breakable crust. When we traversed over to the hill above the road bridge we found boilerplate where there is normally nice powder. We skied down the ice on our edges. It was easy turning on the ice, but hairy because a fall would have been almost out of control. We do both have Whippets, so we might have been able to arrest.
At the bottom of the hill we saw good tracks coming down Mazama and wondered if there might be good snow over there…since we hadn’t found any yet. We skinned up and got lucky. There was a nice 2 inches of powder over the ice and we had a great run down to the bridge along the snow covered creek.
Lisa’s friend was up there working and gave us a tour of one of the buildings. I’ve been rebuilding a custom theme in wordpress, trying to re-learn the stuff I used to teach back when we still had a web program and taught theme building.
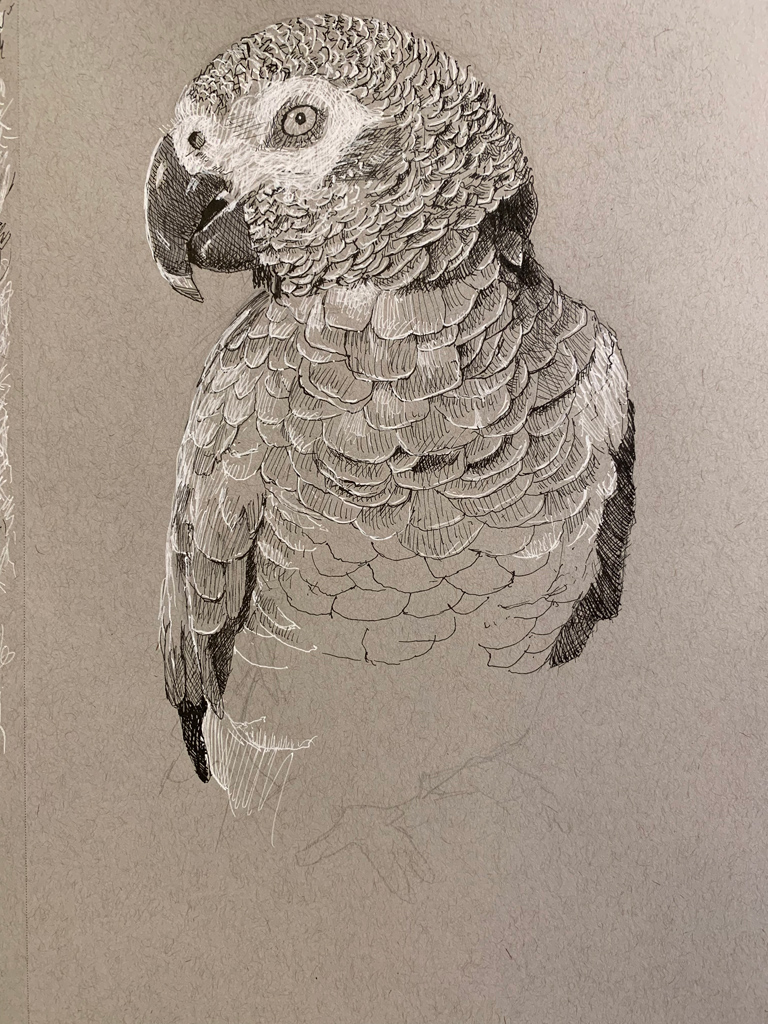
And I finished my parrot drawing. I need to find something else to draw. I’ve been thinking about doing a huge 20 x 30″ canvas of Joshua Tree. I have those 3 sketches and it might be fun to do a wild and crazy palette knife painting of Cyclops Rock. I’m in the mood to sling some color around. All this pen and ink is fine…but I miss me some color.
Our Corolla had been parked for a couple months after hemorrhaging oil and showing a low oil light. I youtubed the process and decided it was too hard. My mechanic got in there and found that the front gaskets on the crankshaft and cam shaft were original and hard as wood. One had blown up. While he was in there he replaced the water pump, timing belt, a couple other belts, plus the coolant and an oil change.
I told him to just tow it the dump if it looked risky. But even after sitting two months it started right up. Made a few weird knocking noises…but I think that was normal. It drove down there sounding like it’s old self. That engine has a sweet little rhythm. He seemed to think so too…and I am $980 poorer. Still, you can’t buy a car that reliable for that much…and I like having a spare car. We have no new cars anymore. Rav4 has 110k, Tacoma has 240k, so this Corolla is my backup car. It’s nice to have a spare.
one hour in
3 hours in
My set up
drawing from laptop
8 hours in
George on Gills shoulder
rOtring Isograph
Heading for 400,000
Can’t kill this car
$980 to replace Crank and camshaft gaskets, water pump and belts
Since returning from Jtree I’ve got back into the swing of things with ping pong and the climbing gym. My first few games were pretty rough, a lot of bad balls. But now I’ve got a versatile serve, and a decent number of my slams work. I was climbing so badly when I first returned that I’d have to hang 4 times on the way up a 10 minus. After a month of hitting it twice a week my power is returning and I led two of the steep tens cleanly.
I drove out to Orting to shoot some reference photos of a friends African Gray parrot. He is a former student and a super nice guy. I always admired his intelligence and life experience. He’s 82 now and still sharp as a tack…and he has this super cool parrot. I’ve got the drawing almost finished, and as usual there are some huge errors. Pen is super frustrating that way. Errors happen, and you have to leave them. Anyway this is about two hours in. I’ll post the finished one soon.
Clint got a dog 7 years ago when he bought his house. He brought Wyatt over this week and I set up my bright video light to shoot some reference photos. With the bright light I was able to shoot them at F-8. My 24-105L lens has image stabilization, which meant I was shooting at 1/125 of a second with ISO set at 1600.
For decades I swore I would never draw from photos…but recently I’ve made an exception for animals. No matter how much you pay them they won’t sit still. The statue and the shoe were done from life. Last is a capture from Paradise, where the snow has been falling during the gubmint shutdown.
I finished my drawing of the dog that shared our campspot down in Jtree. This mellow dog got a lot attention from the people sitting around the fire. At one point there was a van of 4 twenty something climber girls sitting around the fire. The darn dog spent the evening walking from one person to the next, soaking up all the attention he could get. His owner Lilly had put a furry leopard hat on his head to keep him warm – it was in the twenties. We were all laughing as the dog simply put up with the hat, and kept coming around for hugs.
My buddy Chad later joked that he wished he could have borrowed the hat from the dog. His plan was to walk around on his hands and knees wearing the leopard hat, see if he could get some similar attention from the ladies. That was one lucky dog.
I’ve not written in a month. On December 12 I finished a my second dog drawing and mailed them both off to my brother. He knew I was into pen and ink and had taken the photographs of his dog and a friends dog with his new Nikon full frame DSLR.
~
I was fully expecting them to think they were bad because so much of my art simply gets shelved. But to my great surprise, he sent me a nice check for the two drawings. Pricing pet drawings is anybodies guess. A quick check on etsy has prices ranging from $28 to $350. Mine take me around 6 hours to draw. Assuming I was drawing well, what would an hourly wage be? The whole artist pricing structure is a mystery.
With school out and commissions in the mail I was a free man. I drove to Jtree in 30 hours. It took me 4 hours to get the 30 miles from Tacoma to Olympia thanks to a massive truck wreck that blocked all lanes of I-5. At 2 AM I slept in a rest area somewhere in southern Oregon, woke up at dawn and drove the rest of the way to Jtree, arriving at 1 AM. I didn’t know it that night, but there is now free BLM land camping down there. I learned about it from a friend who is a travel nurse. He lives in his van and parks it either there or in the hospital parking lot. The BLM camping has been there forever…I just never hunted it down.
Day 2
Hooked up with my friend Richard and Annie. We did a bunch of routes around Hidden Valley including Bousioneer and Hands Off. We loaned our top rope to Lilly and Matia who didn’t want to do the down climb off The Blob. Matia invited me to camp with them since they had an extra parking spot. Making friends at Jtree is the only way to get a camping spot. The campground is permanently full with climbers…but if you make a friend, you are golden.
Day 3
Richard and I met up with L. at Hemingway where we climbed White Lightning 5.7 and Overseer 5.9. It got cold so we diverted to some sunny walls in the afternoon.
Day 4
Richard advised me to take a rest day every 3 days to keep my fingertips healthy. I painted the West face of Chimney Rock while Lilly drew the same scene in colored pencil.
Day 5
Richard set me up with Annie and we spent the day doing easy stuff like Mikes books and Double Dip. Annie is a lot of fun and works as a Nurse Practitioner.
Day 6
Richard, L. and Todd Gordon picked me up and drove us out to Outer Mongolia. It’s a one hour approach along the boy scout trail. Todd lives in Jtree and is a super nice guy. Later in the trip he invited everyone to his house for New Years. I chose to do the usual bonfire at Hiden Valley but regretted it. There were 3 drunks this year and it sort of sucked the fun out of it. I heard that Todd’s friend John Long was there. Several of my friends were there and got to meet the legendary Largo.
Day 7
I took my campmate Lily over to Echo where we did double dip. I talked her into doing her first lead ever over by the Solarium. She aced it.
Day 8
was another rest day. I painted chimney again, but from the north. The weather had been baking for a week straight by now.
Day 9
Chad arrived while Richard, Annie, L. and I were doing a moonrise picnic on Cyclops. Chad is a great partner and a very funny guy. I’m well known for making easy climbs look hard. Chad makes hard climbs look easy.
The days blur together
The routes blur together after Chad arrived. It got cold for the last two weeks. We still climbed but had to stay on the sunny sides. Here is a brief list:
Flake – me
Orphan – me
Dandelion – Chad
Bousonier – both
Papa Woolsey – both, Chad onsighted it in the dark
Double Cross and Sexy Grandma – both
Chalk up another one – Chad
Damper and Pinched Rib – me and Chad respectively
Stick to what – me
Popes crack & Touch and go – Chad
Heart and sole – Chad
Fisticuffs – me
Breakfast and the shutdown
Chad loaned me some bacon, man that stuff is good! There is something about camping in 15 degree weather that makes me hungry for old fashioned unhealthy fat. After the first week the government shutdown happened. The rangers opened the camping pay box and stopped charging for camping. They basically walked away from the park, leaving the doors wide open and all the park offices shuttered. There were still LEO’s patrolling and responding to rescues and car accidents…but it was a weird time in the park.
On 1-02-19 they shut down the campgrounds, turning the park into a day use area. It seemed dumb because our restrooms and dumpsters were in fine shape. Volunteers (Todd included) were bringing up TP. The only bad thing I saw was cars parked illegally and one tent set up on a trail by hung over New Years eve partiers. There were TV crews up there so I guess there was chaos in other areas of the park, but we didn’t see it.
Last rest day
I was unhappy with this painting of Cyclops. I couldn’t get it off life support and considered wiping it down to blank canvas. But before that happened I decided to throw in some blue. It may be breathing now. Several friends who saw it liked it.
I’m home now and unemployed until April when I may have an opportunity to teach again. Trouble is I need a job right now…bills to pay and all that. I’m going to start looking for work this week. My wife saw me typing all this stuff and asked me who reads it. I told her no one, except maybe me in 5 years when I’m looking back and wondering where the time went. It’s fun to have a record.
Normally when I buy a sketchbook it fills up with junk. I’ll have receipts from climbing trips and campgrounds taped to the pages alongside bad drawings of my hand, and maybe a smudged portrait of the pickup truck parked across the street. Oh, and plans for some new invention that becomes a one off. I litterally have a stack of sketchbooks going back to when I was 17. If I stacked them all up it would be two feet tall. And there might be 20 decent drawings altogether.
But ever since I got this new Strathmore Toned sketchbook I haven’t done a bad drawing. That’s 3 drawings on 3 pages, and none have bombed. Here are the last two. One is 6 hours of work, the other is 30 minutes. I’m using the Isograph pens plus the Sakura Gellyroll whites. I tried to put white ink in my 0.5 Isograph, but it didn’t flow well, so I ordered a 0.8…hoping the larger diameter can carry the white pigment better. I’ve also ordered the 0.1, which will do hair lines. Because I use them everyday, I’m leaving the ink in overnight…maybe clean them on the weekend. I’m getting over a bad cold…hoping it won’t mess with some upcoming holiday plans.
I got my Rotring Isograph pens from Germany today. Shipping took about a week. I’ve been using a hodgepodge of pens up until now: Dip quill pen, Pigma Pen, Pentel Hybrid ballpoints. But after pouring some ink into these Isograph pens I’m sold big time. They flow sooooo well. The Pentels Slicci pens were quite good but they tended to have flow issues at times, especially the 0.25 size, which is my favorite.
Drawing on gray paper
These Rotrings are the cats meow. This is the first time I’ve tried drawing with ink on a toned paper. The paper is Strathmore Series 400 Toned Gray, medium surface. By starting on a neutral ground (gray) I can add dark to push away, and white to pull highlights toward me. Any gray mid tones are already there…the paper is colored gray. This saves a tremendous amount of work, as compared to drawing on white paper. On white, you have to preserve the highlights by drawing around them, and then draw all the other tones, from darks to midtones. The technique has been around for centuries, but I recently discovered this new paper while studying the works of Kevin Keele. He also uses Prismacolor markers in a shade slightly darker than the paper…I’ve not mastered that yet, but I do like the idea.
Clean up
I’m not sure how much trouble these Isographs will be to clean up. It took me 20 minutes to clean two pens, but it was my first time. If I was using them tomorrow I’m sure they’d be fine overnight. There are rubber seals in the caps. And the caps don’t just snap on, they screw on. People write online about using these pens for 30 years straight. This guy on YouTube says you can leave the ink in them for up to a week.
I’ve ordered some rOtring white ink so I don’t have to use the ballpoint Sakura Gelly Roller whites. They tend to ball up like most ballpoints, though I do like them. But pouring rOtring white ink into my Isograph should be far superior. I’m going to try it out today, as it just came in the mail. Or rather I should say, I had it shipped to the Amazon yellow box at Safeway.
Drawing from photos
On a side note, I swore years ago to never draw from photos. But similar to my rule about never top roping in climbing, I had to break my ‘draw from life’ rule to do dog portraits. They don’t hold still worth a darn. Plus I’ve got a bad cold, and don’t have the energy to stand out in the studio doing a still life…which was my other option today. I can do these dog studies sitting on my soft couch.
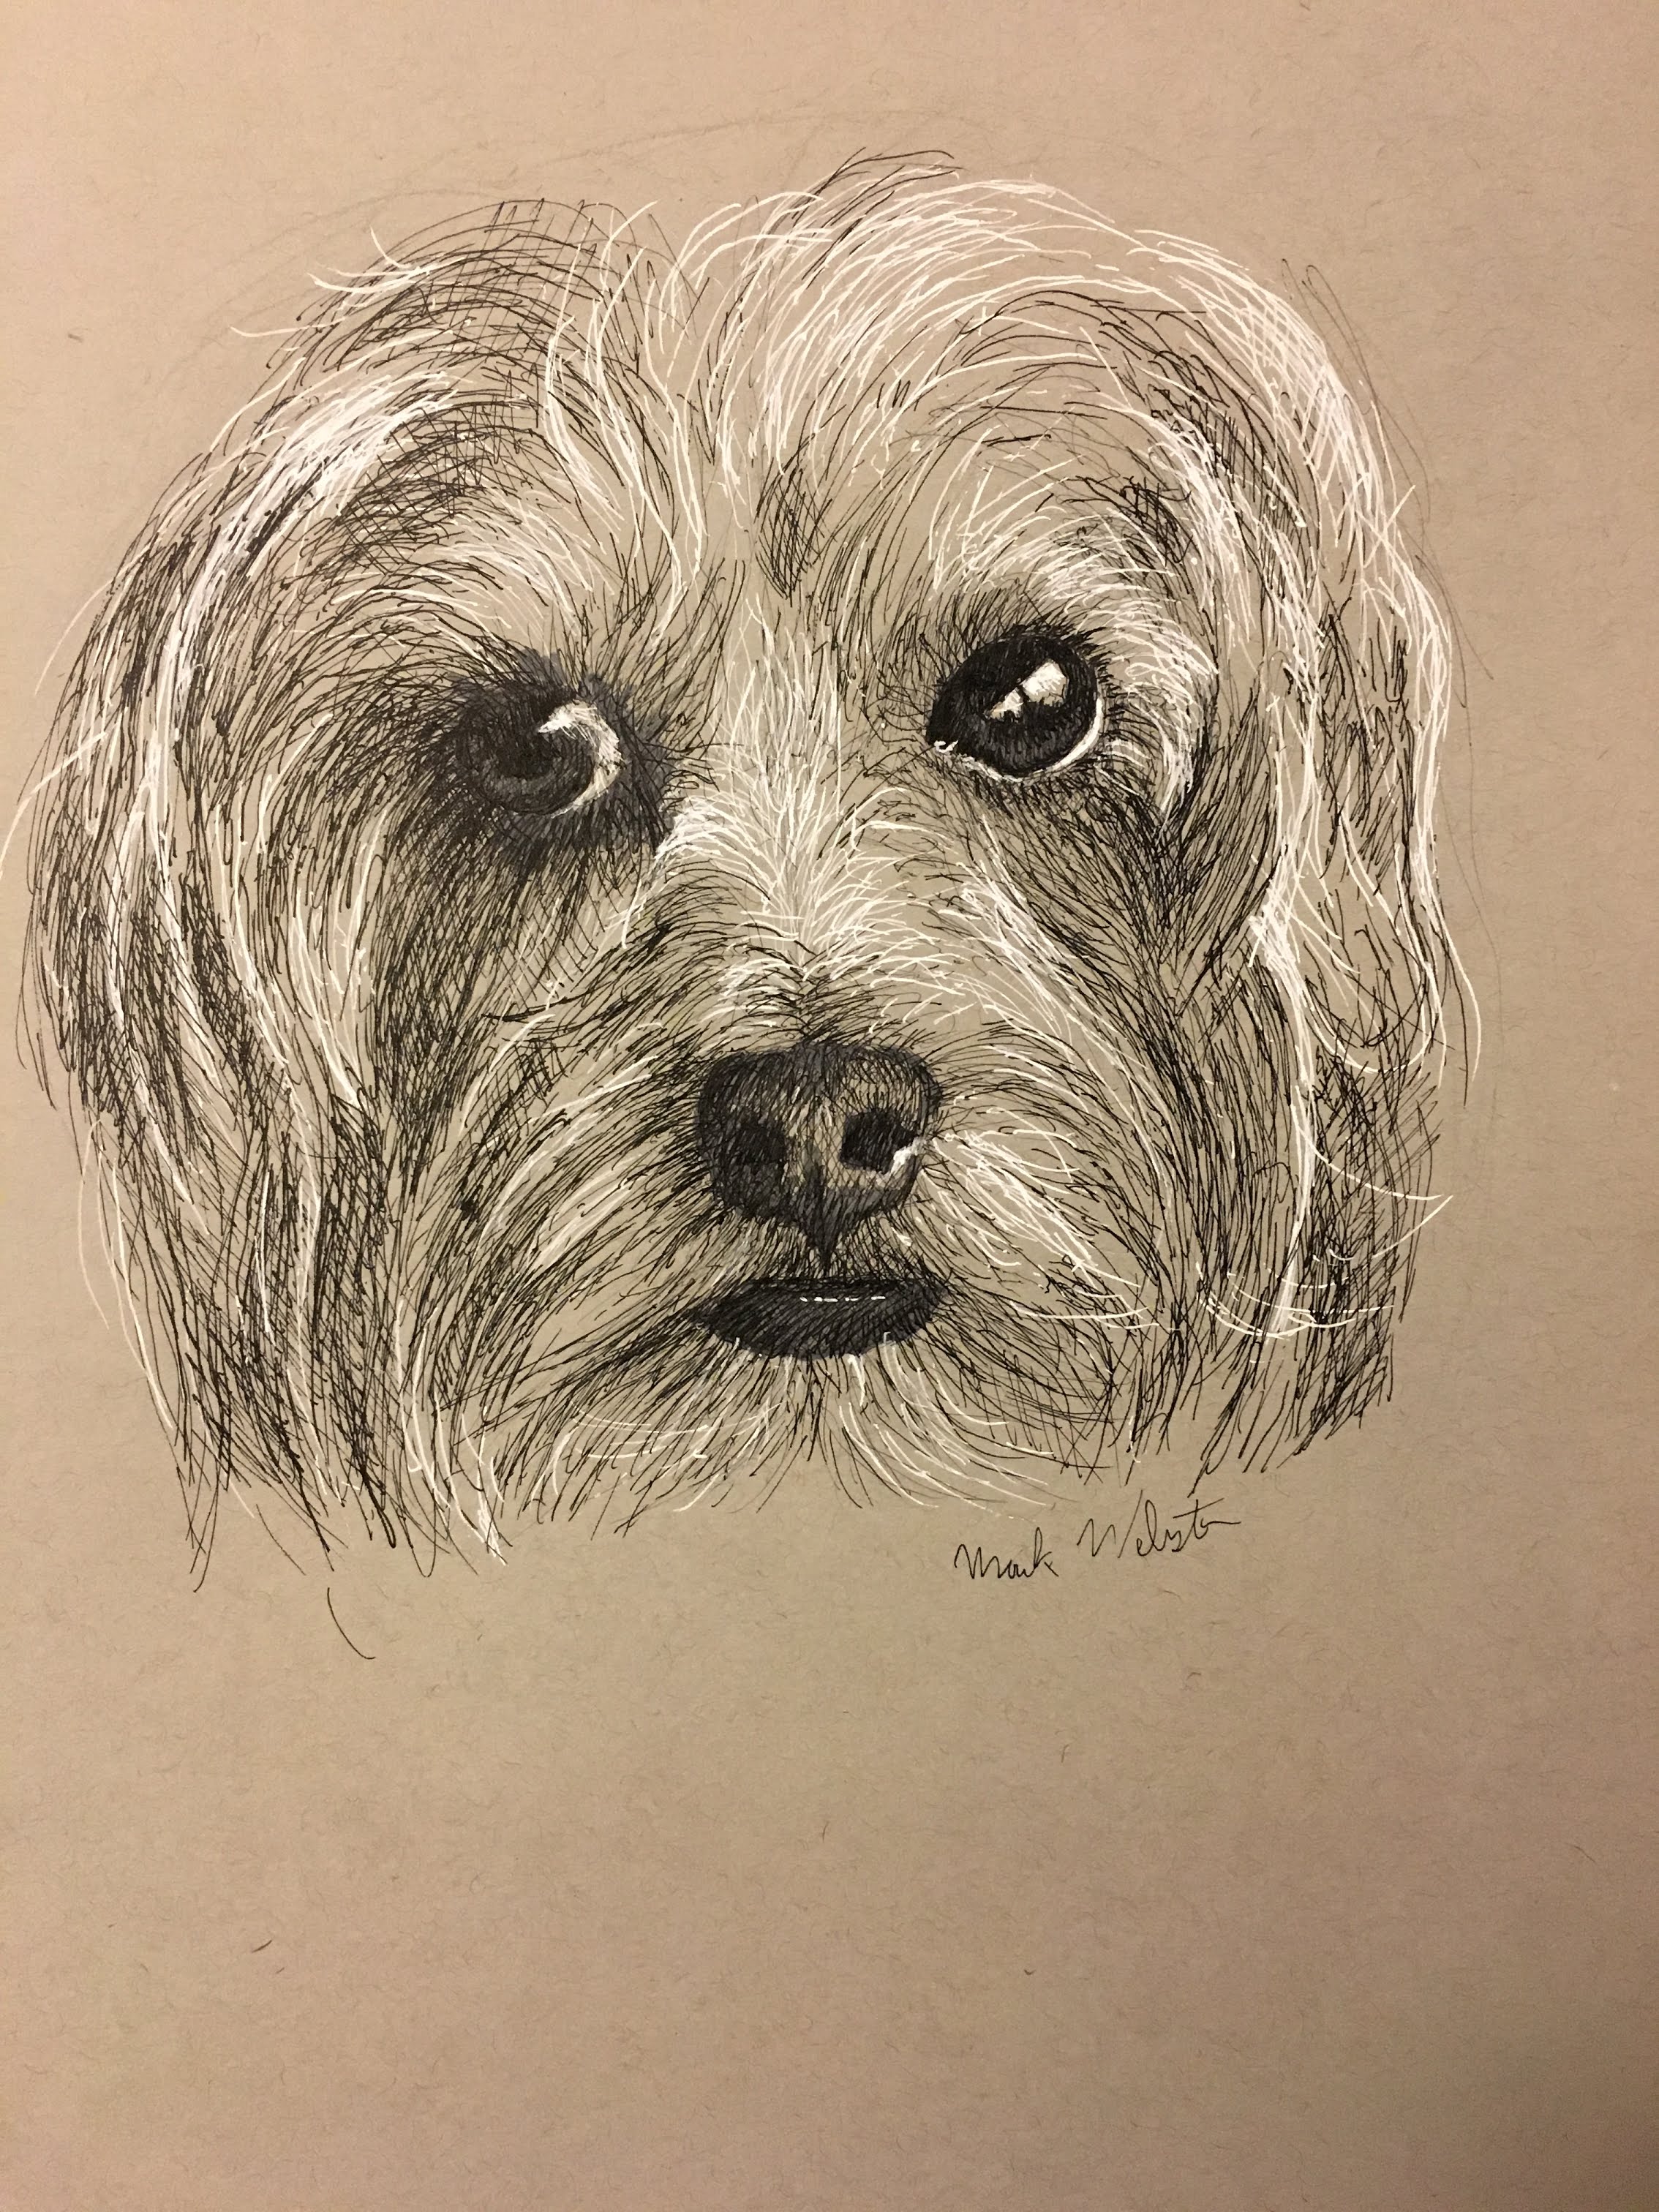
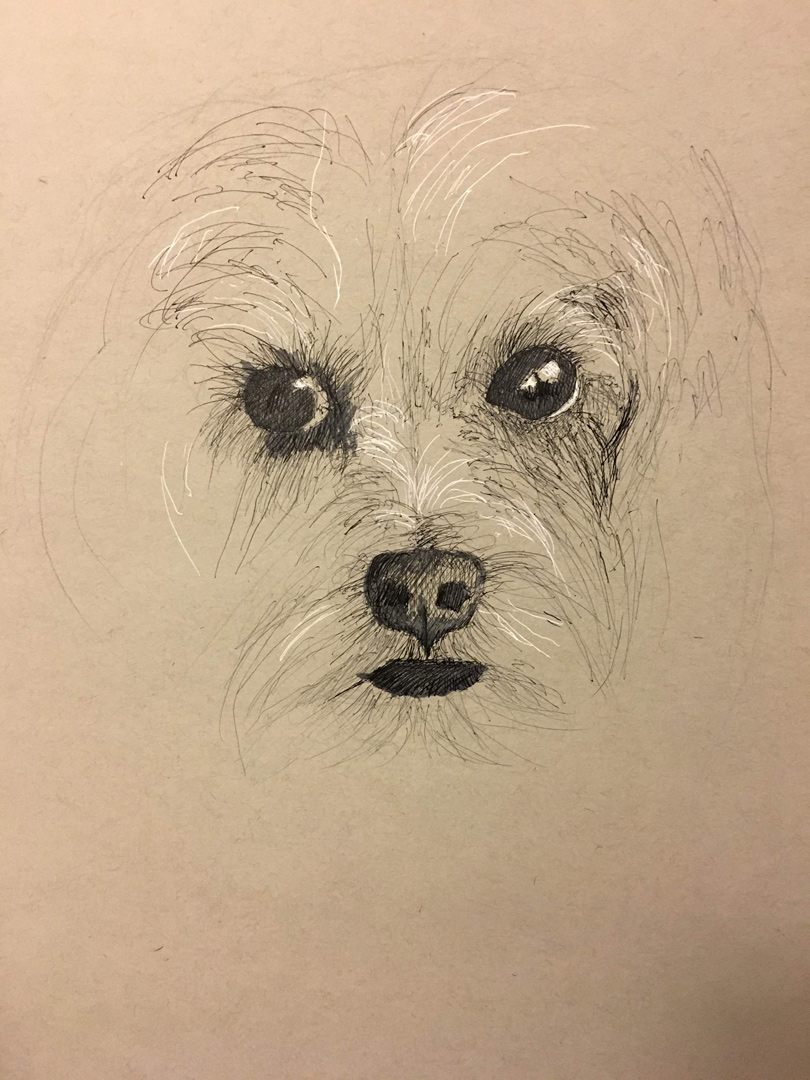
Anyway, here are the drawings, I’ve shown the 4 step progression of the drawing of Mary’s dog. Honeybear (my brothers dog) needs another couple hours work:
I’m not sure how it happened but I’ve fallen back into pen and ink. I’ve known I needed more practice at the craft of drawing for some time. For example, if you can’t draw, starting a painting is very hard. You try to draw the shapes, and they are all wrong. So from the very first half hour of work the painting will suck if you can’t draw. And a sucky start means the painting will get abandoned.
So when I was at a friends house and she showed me her dog drawings it occurred to me that I should get into pet portraiture. Everyone’s got a dog, except us, so why not do some dog portraits? I took some photos of her dog, got out my india ink dip pen and went to town. This is my first dog drawing ever:
Marys dog
That was so much fun I took a picture of my sons’s dog while we were dog sitting during their recent Hawaii trip. I used a dip pen some, but mostly I used Pigma markers. Those are disposable felt tipped markers that use permanent India Ink. They are lovely when new, but they only last a few drawings.
The grand dog
I loved the look of pen so much I decided to invest in some decent tools. After some online research I settled on a rotring isograph and ordered 3 from Germany. No one carries these high end pens anymore. Back before CAD they were the standard for architects and Graphic Designers. The darn things can last for up to 30 years. The only people using them now are Illustrators.
Anyway they took forever to arrive so I went down to the art store and picked up some high end permanent ink ballpoints made by Pentel. They are the Slicci model and come in widths from 0.25 to 0.8mm. Those things are quite nice! Super sweet thin lines, and they almost do a fade when used fast. I got a pack of 4 different sizes for $13. They seem quite a bit better than the Pigmas. It’s about time someone improved on the disposable Pigmas…they’ve had a 20 year run.
I wanted to do some work from life, instead of photos so I started this portrait today using the Pentel ballpoints. I hope to finish it tomorrow…or the next day. I’m so enamored with these tight little ballpoints the rotring technical pen may be a let down. Still, The refillable rotring’s have the ability to use white and black ink, which could be super awesome on gray paper. I hope to learn that technique in the coming weeks.
40 minutes of drawing
80 minutes of drawing
3 hours of drawing
I love the way pen gets you in the zone so quickly. There is no erasing with pen and ink, so it forces clarity. And the 0.25mm tip is so light and wispy it’s almost like drawing with a 4h pencil. The lines are insignificant when laid down lightly so you can almost sketch with abandon. They don’t have an impact until you really lay in some hatching.
I did do my standard egg shape under drawing in a 4h pencil before starting in with the pen. No sense living dangerously. I was careful to measure out the center of the skull, the one quarter height of the upper lip, and the 5 eyes across measurement to get the nose and eyes looking real. You can see those faint 4h lines marking out 5 equal spaces across the eyes level. This will be a fun one to finish.
Artist have been studying anatomy and bones for thousands of years. Leonardo Da Vinci did some amazing drawings of anatomy in 1500. The theory is that if you can understand the bones and muscles under the skin, you can more accurately draw from life.
I recently finished my turban squash on a leather box. I wanted to paint the box again and tried a couple things on the box (cams, and hexes) but they didn’t look good. I tried out a skull I’ve had since the eighties and it looked just right. Two old things, both powerful in their own right for different reasons. I spent about a week tinkering with it. I love having a still life set up to come home to after work. On the weekend, if I don’t have a climbing partner, or it’s raining, I can have almost as much fun painting as I have climbing…no partner required.
Cutting and staining picture frame molding
I discovered that Home Depot stocks unfinished picture frame stock by the yard. It already has the rabbet and a nice profile. And it’s only about $13 for 8 feet. I’ve found and worked a tutorial that explains how to finish the wood with acrylic paint and gold leaf.
handmade picture frame
And I’ve worked out most of the bugs in my frame making procedure. They mostly had to do with finding an easier way to measure my 45 degree miter cuts. The two sides of the frame, long way and short way, have to be exactly the same length. So you measure one, set up a stop on the saw. Bump the first piece to the stop, cut. And then use the stop to cut the next side. That gives you to sides that are exactly the same length. They might be the wrong length if you didn’t measure correctly, but they will at least make a frame with tight corners.
Also, make sure the faces of the cuts are exactly 90 degree perpendicular to the table, or ground. I bought two different angle measures which I use both before and after cutting. I was initially using some fancy math to get the length of the frame sides, based on the width of the frame stock, minus the rabbet, plus the ‘slop’. But it was touchy math, because some of the stock had a deeper rabbet, or wider sides, and it was just too much thinking. I’d get the frame put together and the painting wouldn’t fit in. I’d have to cut the painting down.
Finally I realized that I need to measure in the rabbet. If painting is 12 x 16, the rabbet hole needs to measure 12.125″ x 16.125″, plus a little. So I make my marks on the rabbet edge. Then I use an angle to move those marks out to the outside top of the frame. I lower the miter saw blade down (power off) and eyeball the blade edge so it just grazes the pencil mark. I make the cut, then examine inside the rabbet to see if the cut matches the rabbet mark…which is an extension of the mark on the top of the frame.
measure in rabbet
I do all this measuring and cutting on the other end of the frame side. Then I double check the measurement of the rabbet length. After cutting both ends of the frame side, it should be 0.125″ longer than that side of the painting. After all this work, it’s ready for clamping, glue and nails.
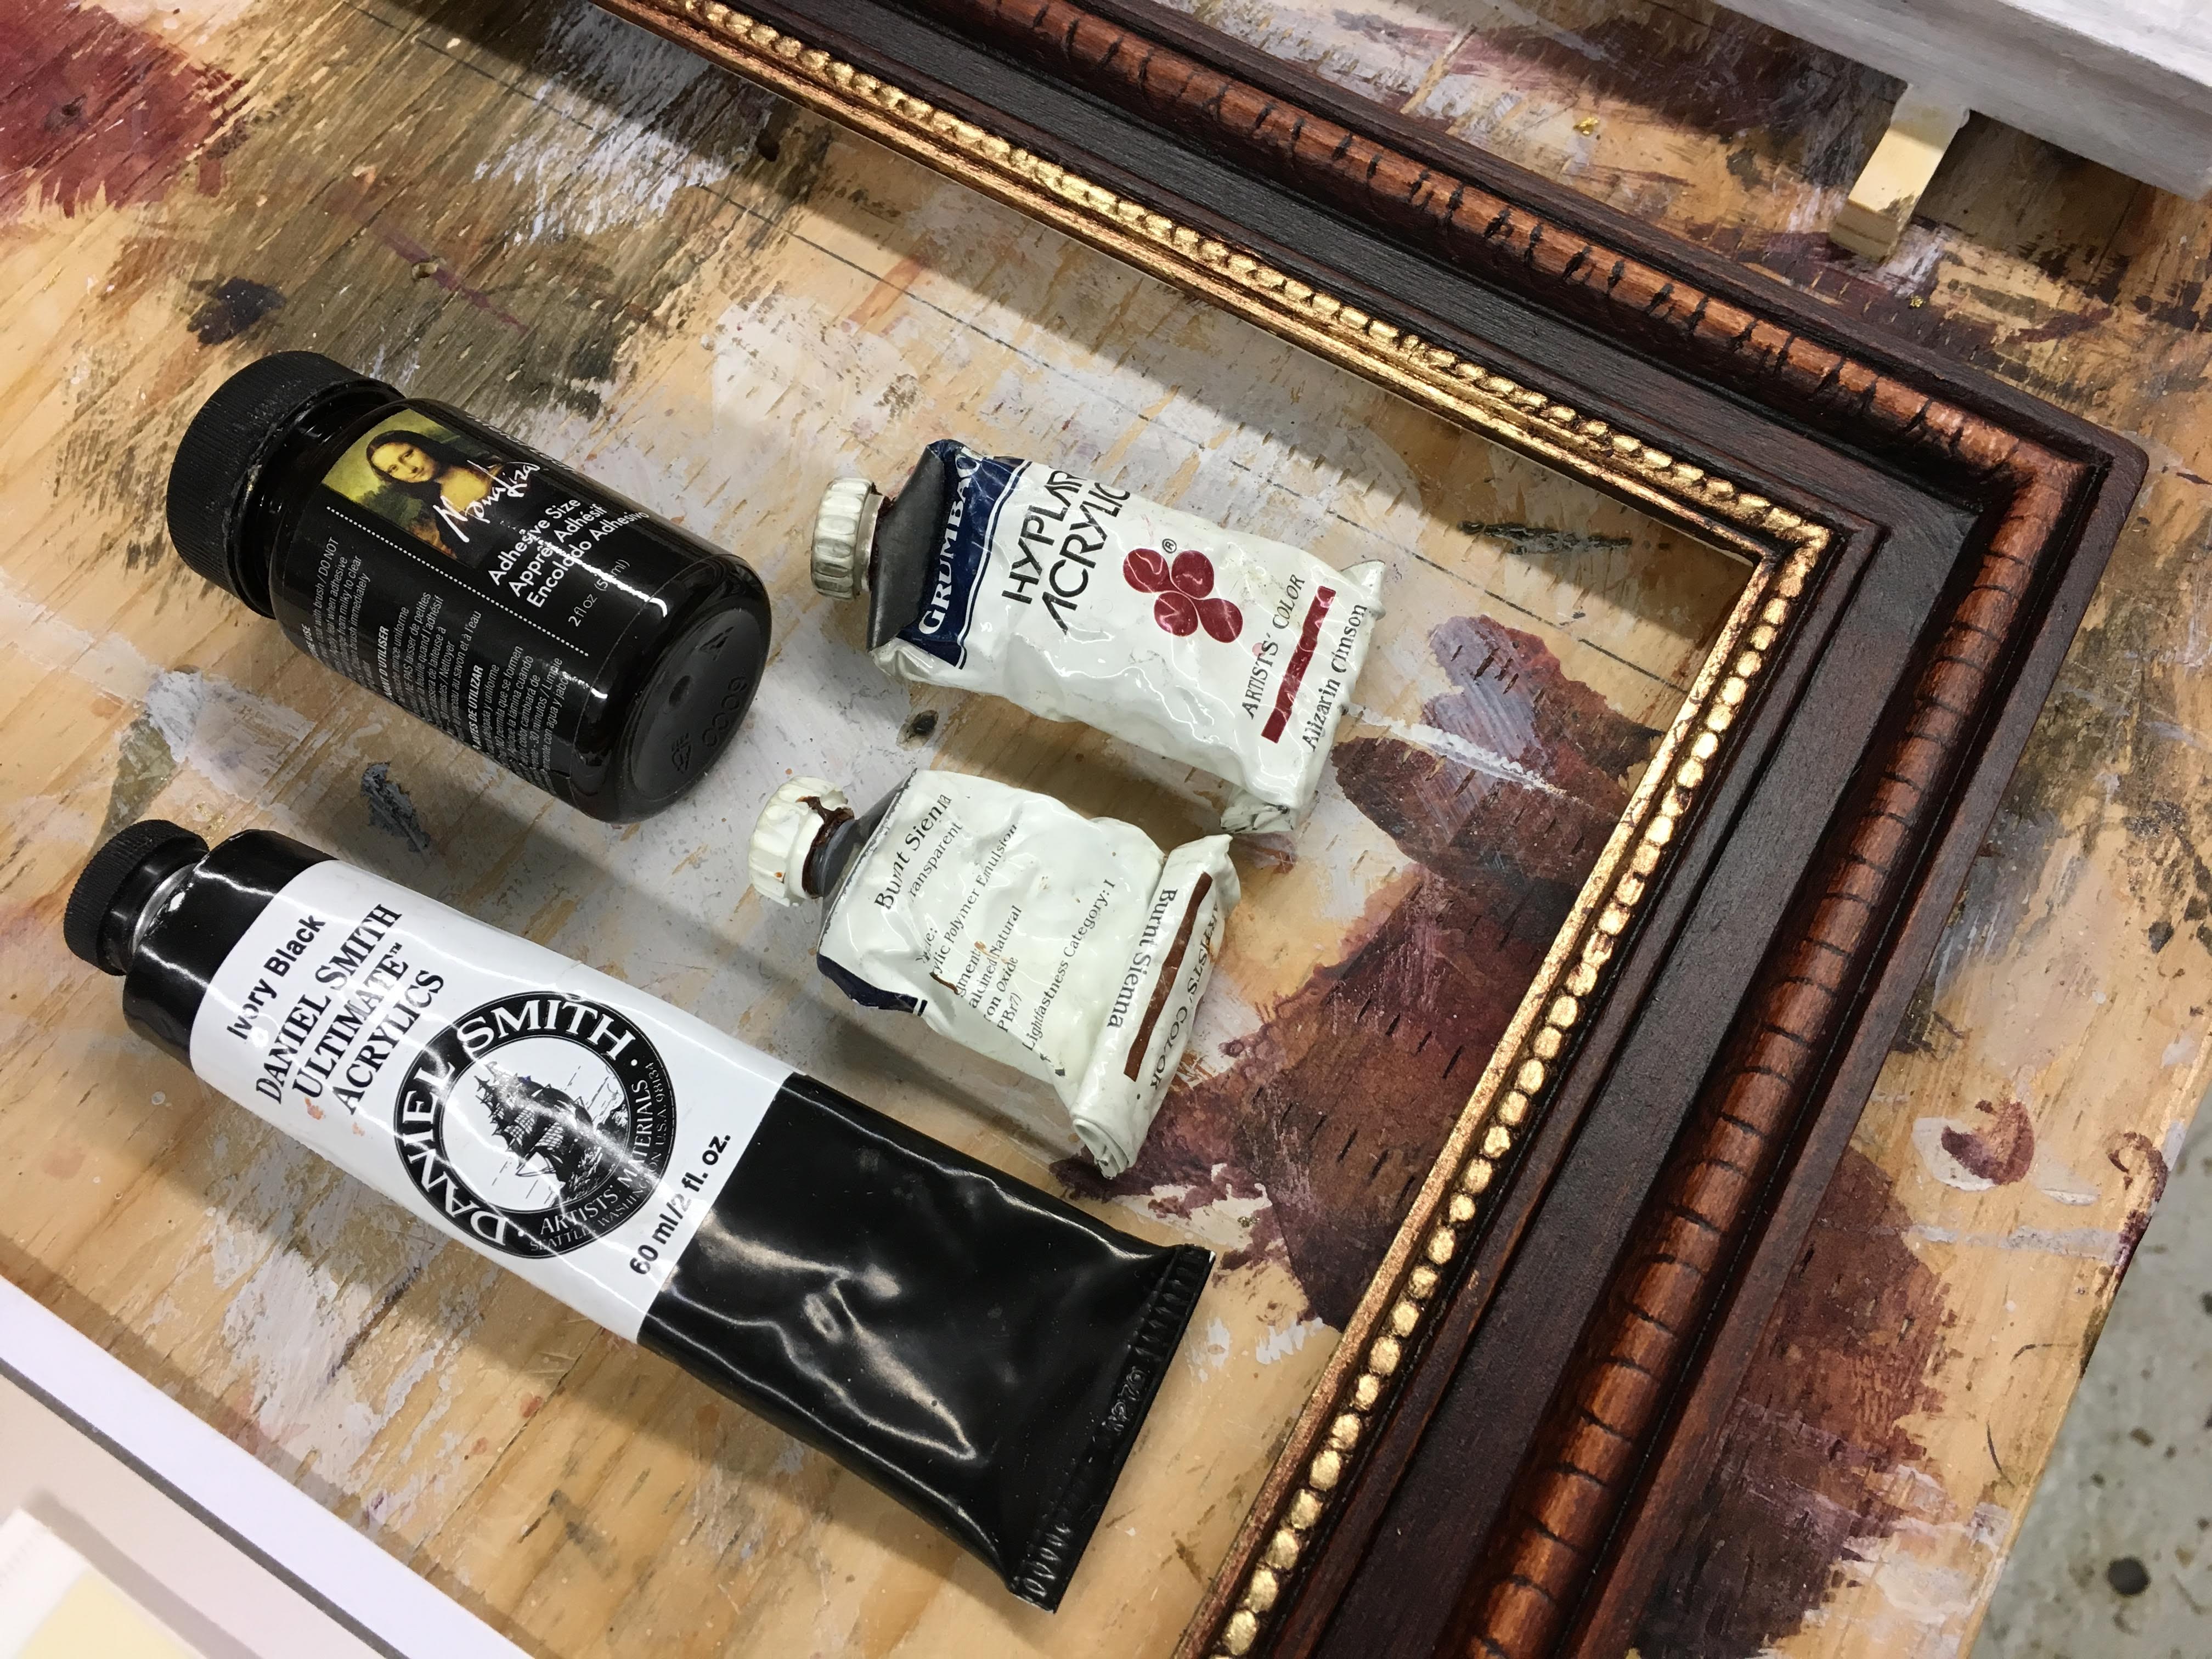
Then I start in on the finishing, which includes gesso, sanding, burnt sienna acrylic, (or transparent oxide red) and gold leaf.
I let that dry. Over that I brush on a mixture of mostly black with a little burnt sienna or Alizarin Red. I wipe that off the gold leaf and selected areas of the frame. These are all artists paints. I discovered that Golden Open paints don’t work, because they ‘open’ lower layers of paint. I have to use traditional Acrylics.
I like to think that the internet has a positive side. I ask my new students each quarter to define the internet. What is it? The best answer I ever got was this:
“It’s the consciousness of the modern world”
I like that explanation. When we google stuff we are basically asking the world, via the internet. I sometimes frequent websites devoted to art. On one of those today someone asked if they should spray fixative on a pastel drawing. This is a common concern, especially in the frame making community.
No one wants to frame a pastel and then have it returned to the shop because the pastel dust slid down and got trapped between the matts and the glass. It makes an unsightly mess. It’s easily fixed, but takes about an hour each painting. It involves opening up the frame and carefully vacuuming and or erasing with a sticky gum eraser until the matt and glass is clean. An easy fix is to use matts that have some speckle in them. And to build in a ‘dust catcher slot’ in the frame. This is basically a 1/8″ slot of air between the pastel and the first matt. So if pastel dust falls, it drops into the slot and doesn’t make a mess.
Here is the message I wrote on the art website explaining all this:
Spray fix is important for a pencil drawing. However, if you care about your pastel drawings, never, ever spray them. The fixative turns a bright white pastel mark to dull gray. Something about the fix kills the highlights.
To store a pastel, get some shiny paper, such as the kind that glossy magazines are printed on. You can get this from large print shops, probably for free. They use it to get their printing presses ready for a production run. It’s called ‘make-ready’ stock, 80# enamel gloss. Use removable tape and tape the shiny paper to the top edge of the pastel drawing. The pastel won’t stick to the shiny paper…or, at least, not enough of it to matter.
This allows you to view the pastel by lifting – hinging up the protective shiny paper, and then flop it back down when you want to store the pastel. I typically tape two sheets of cardboard together and carry a dozen pastel paintings in my plein air backpacking kit. When I want to frame a pastel, I pull the shiny paper off, wipe it down and use it for another pastel.
Also, when you do go to frame them behind glass, hold the pastel up and smack it sharply on the back numerous times with your thumb. This knocks off all the loose pastel dust. Examine the pastel, make sure it doesn’t need touch up, and then smack it again. Once it’s framed under glass, it’s good for hundreds of years.
If a few pastel specks float down off the painting after framing, they will drop down into the ‘dust catcher slot’ between the pastel and the first matt, which should be about 1/8″.
Appropriate uses for fix on a pastel drawing might be where you have overpainted a section and the paper won’t accept anymore pastel because you’ve covered up the ‘tooth’ of the surface. Your options are: (1.) to brush the pastel off with a stiff brush like a toothbrush, which gives your paper back it’s tooth, or (2.) to spray fix on that area, which glues the pastel down and creates tooth from the glued down pigment.
But fix is smelly, and it’s better to use a paper with high tooth (Rives BFK) or one of the sanded papers, and be careful not to overwork the tooth.