Strathmore toned paper

Posted by on December 6th, 2018  •  0 Comments  •  Full Article

Normally when I buy a sketchbook it fills up with junk. I’ll have receipts from climbing trips and campgrounds taped to the pages alongside bad drawings of my hand, and maybe a smudged portrait of the pickup truck parked across the street. Oh, and plans for some new invention that becomes a one off. I litterally have a stack of sketchbooks going back to when I was 17. If I stacked them all up it would be two feet tall. And there might be 20 decent drawings altogether.

But ever since I got this new Strathmore Toned sketchbook I haven’t done a bad drawing. That’s 3 drawings on 3 pages, and none have bombed. Here are the last two. One is 6 hours of work, the other is 30 minutes. I’m using the Isograph pens plus the Sakura Gellyroll whites. I tried to put white ink in my 0.5 Isograph, but it didn’t flow well, so I ordered a 0.8…hoping the larger diameter can carry the white pigment better. I’ve also ordered the 0.1, which will do  hair lines. Because I use them everyday, I’m leaving the ink in overnight…maybe clean them on the weekend. I’m getting over a bad cold…hoping it won’t mess with some upcoming holiday plans.

Rotring Isograph pens for Illustration art

Posted by on December 4th, 2018  •  0 Comments  •  Full Article

I got my Rotring Isograph pens from Germany today. Shipping took about a week. I’ve been using a hodgepodge of pens up until now: Dip quill pen, Pigma Pen, Pentel Hybrid ballpoints. But after pouring some ink into these Isograph pens I’m sold big time. They flow sooooo well. The Pentels Slicci pens were quite good but they tended to have flow issues at times, especially the 0.25 size, which is my favorite.

Drawing on gray paper

These Rotrings are the cats meow. This is the first time I’ve tried drawing with ink on a toned paper. The paper is Strathmore Series 400 Toned Gray, medium surface. By starting on  a neutral ground (gray) I can add dark to push away, and white to pull highlights toward me. Any gray mid tones are already there…the paper is colored gray. This saves a tremendous amount of work, as compared to drawing on white paper. On white, you have to preserve the highlights by drawing around them, and then draw all the other tones, from darks to midtones. The technique has been around for centuries, but I recently discovered this new paper while studying the works of  Kevin Keele. He also uses Prismacolor markers in a shade slightly darker than the paper…I’ve not mastered that yet, but I do like the idea.

Clean up

I’m not sure how much trouble these Isographs will be to clean up. It took me 20 minutes to clean two pens, but it was my first time. If I was using them tomorrow I’m sure they’d be fine overnight. There are rubber seals in the caps. And the caps don’t just snap on, they screw on. People write online about using these pens for 30 years straight. This guy on YouTube says you can leave the ink in them for up to a week.

I’ve ordered some rOtring white ink so I don’t have to use the ballpoint Sakura Gelly Roller whites. They tend to ball up like most ballpoints, though I do like them. But pouring rOtring white ink into my Isograph should be far superior. I’m going to try it out today, as it just came in the mail. Or rather I should say, I had it shipped to the Amazon yellow box at Safeway.

Drawing from photos

On a side note, I swore years ago to never draw from photos. But similar to my rule about never top roping in climbing, I had to break my ‘draw from life’ rule to do dog portraits. They don’t hold still worth a darn. Plus I’ve got a bad cold, and don’t have the energy to stand out in the studio doing a still life…which was my other option today. I can do these dog studies sitting on my soft couch.

Anyway, here are the drawings, I’ve shown the 4 step progression of the drawing of Mary’s dog. Honeybear (my brothers dog) needs another couple hours work:

Pen and Ink

Posted by on December 2nd, 2018  •  0 Comments  •  Full Article

self-portrait-pen2018

I’m not sure how it happened but I’ve fallen back into pen and ink. I’ve known I needed more practice at the craft of drawing for some time. For example, if you can’t draw, starting a painting is very hard. You try to draw the shapes, and they are all wrong. So from the very first half hour of work the painting will suck if you can’t draw. And a sucky start means the painting will get abandoned.

So when I was at a friends house and she showed me her dog drawings it occurred to me that I should get into pet portraiture. Everyone’s got a dog, except us, so why not do some dog portraits? I took some photos of her dog, got out my india ink dip pen and went to town. This is my first dog drawing ever:

Marys dog

Marys dog

That was so much fun I took a picture of my sons’s dog while we were dog sitting during their recent Hawaii trip. I used a dip pen some, but mostly I used Pigma markers. Those are disposable felt tipped markers that use permanent India Ink. They are lovely when new, but they only last a few drawings.

The grand dog

The grand dog

I loved the look of pen so much I decided to invest in some decent tools. After some online research I settled on a rotring isograph and ordered 3 from Germany. No one carries these high end pens anymore. Back before CAD they were the standard for architects and Graphic Designers. The darn things can last for up to 30 years. The only people using them now are Illustrators.

Anyway they took forever to arrive so I went down to the art store and picked up some high end permanent ink ballpoints made by Pentel. They are the Slicci model and come in widths from 0.25 to 0.8mm. Those things are quite nice! Super sweet thin lines, and they almost do a fade when used fast. I got a pack of 4 different sizes for $13. They seem quite a bit better than the Pigmas. It’s about time someone improved on the disposable Pigmas…they’ve had a 20 year run.

I wanted to do some work from life, instead of photos so I started this portrait today using the Pentel ballpoints. I hope to finish it tomorrow…or the next  day. I’m so enamored with these tight little ballpoints the rotring technical pen may be a let down.  Still, The refillable rotring’s have the ability to use white and black ink, which could be super awesome on gray paper. I hope to learn that technique in the coming weeks.

40 minutes of drawing

40 minutes of drawing


80 minutes of drawing

80 minutes of drawing


3 hours of drawing

3 hours of drawing

I love the way pen gets you in the zone so quickly. There is no erasing with pen and ink, so it forces clarity. And the 0.25mm tip is so light and wispy it’s almost like drawing with a 4h pencil. The lines are insignificant when laid down lightly so you can almost sketch with abandon. They don’t have an impact until you really lay in some hatching.

I did do my standard egg shape under drawing in a 4h pencil before starting in with the pen. No sense living dangerously.  I was careful to measure out the center of the skull, the one quarter height of the upper lip, and the 5 eyes across measurement to get the nose and eyes looking real. You can see those faint 4h lines marking out 5 equal spaces across the eyes level. This will be a fun one to finish.

Early season Muir attempt

Posted by on November 26th, 2018  •  0 Comments  •  Full Article

paradise-inn

Both of my kids skied to Muir a week ago. Today Lisa and I got up to 8000 feet before my old bones told me they’d had enough for the day. The snow on the Muir snowfield was getting better the higher we climbed but I needed to save some energy for the ski down.  There was barely enough snow in many places. Panorama Face is notoriously narrow for turning and it was even worse today with rocks and grass showing in places.e

The kids have spent the last decade polishing their skills riding the lifts. Meanwhile Sue and I have almost exclusively skied the backcountry, which is free. But the resulting skill differential is huge. Still, I was able to go into survival mode and get down the hill. Once we got off Pan it was much more mellow.

On the way through Ashford I stopped at the https://www.ashfordcreekgallery.com to show Rick a painting I did recently of the old inn. I’d planned on painting the mountain that day but it was fogged in. I’ve always thought the old inn would make a painting and that day it did. Rick hadn’t seen it yet and as soon as I walked in he asked if he could hang it.

I hope that painting makes someone happy. While I was painting it, dozens of people walked by and admired it. I can imagine someone coming down the mountain from a romantic weekend staying in the 100 year old inn and seeing that painting in the gallery.

I had it framed in one of my custom frames that I build from raw unpainted moulding I buy from homedepot. I’ve learned to paint the wood to look very nice, with an accent of gold leaf. And my miter corners are absolutely perfect now. I’m filming a tutorial to be published later on how that all works.

Painting a skull and frame making

Posted by on November 16th, 2018  •  0 Comments  •  Full Article

Artist have been studying anatomy and bones for thousands of years. Leonardo Da Vinci did some amazing drawings of anatomy in 1500. The theory is that if you can understand the bones and muscles under the skin, you can more accurately draw from life.

I recently finished my turban squash on a leather box. I wanted to paint the box again and tried a couple things on the box (cams, and hexes) but they didn’t look good. I tried out a skull I’ve had since the eighties and it looked just right. Two old things, both powerful in their own right for different reasons. I spent about a week tinkering with it. I love having a still life set up to come home to after work. On the weekend, if I don’t have a climbing partner, or it’s raining, I can have almost as much fun painting as I have climbing…no partner required.

Cutting and staining  picture frame molding

I discovered that Home Depot stocks unfinished picture frame stock by the yard. It already has the rabbet and a nice profile. And it’s only about $13 for 8 feet. I’ve found and worked a tutorial that explains how to finish the wood with acrylic paint and gold leaf.

handmade frame

handmade picture frame

And I’ve worked out most of the bugs in my frame making procedure. They mostly had to do with finding an easier way to measure my 45 degree miter cuts. The two sides of the frame, long way and short way, have to be exactly the same length. So you measure one, set up a stop on the saw. Bump the first piece to the stop, cut. And then use the stop to cut the next side. That gives you to sides that are exactly the same length. They might be the wrong length if you didn’t measure correctly, but they will at least make a frame with tight corners.

Also, make sure the faces of the cuts are exactly 90 degree perpendicular to the table, or ground. I bought two different angle measures which I use both before and after cutting. I was initially using some fancy math to get the length of the frame sides, based on the width of the frame stock, minus the rabbet, plus the ‘slop’. But it was touchy math, because some of the stock had a deeper rabbet, or wider sides, and it was just too much thinking. I’d get the frame put together and the painting wouldn’t fit in. I’d have to cut the painting down.

Finally I realized that I need to measure in the rabbet. If painting is 12 x 16, the rabbet hole needs to measure 12.125″ x 16.125″, plus a little. So I make my marks on the rabbet edge. Then I use an angle to move those marks out to the outside top of the frame. I lower the miter saw blade down (power off) and eyeball the blade edge so it just grazes the pencil mark. I make the cut, then examine inside the rabbet to see if the cut matches the rabbet mark…which is an extension of the mark on the top of the frame.

measure in rabbet

measure in rabbet

I do all this measuring and cutting on the other end of the frame side. Then I double check  the measurement of the  rabbet length. After cutting both ends of the frame side, it should be 0.125″ longer than that side of the painting. After all this work, it’s ready for clamping, glue and nails.

Then I start in on the finishing, which includes gesso, sanding, burnt sienna acrylic, (or transparent oxide red) and gold leaf.

I let that dry. Over that I brush on a mixture of mostly black with a little burnt sienna or Alizarin Red. I wipe that off the gold leaf and selected areas of the frame. These are all artists paints. I discovered that Golden Open paints don’t work, because they ‘open’ lower layers of paint. I have to use traditional Acrylics.

More pictures to follow.


Pastel drawings and fixative

Posted by on November 2nd, 2018  •  0 Comments  •  Full Article

I like to think that the internet has a positive side. I ask my new students each quarter to define the internet. What is it? The best answer I ever got was this:

“It’s the consciousness of the modern world”

I like that explanation. When we google stuff we are basically asking the world, via the internet. I sometimes frequent websites devoted to art. On one of those today someone asked  if they should spray fixative on a pastel drawing. This is a common concern, especially in the frame making community.

No one wants to frame a pastel and then have  it returned to the shop because the pastel dust slid down and got trapped between the matts and the glass. It makes an unsightly mess. It’s easily fixed, but takes about an hour each painting. It involves opening up the frame and carefully vacuuming and or erasing with a sticky gum eraser until the matt and glass is clean. An easy fix is to use matts that have some speckle in them. And to build in a ‘dust catcher slot’ in the frame. This is basically a 1/8″ slot of air between the pastel and the first matt. So if pastel dust falls, it drops into the slot and doesn’t make  a mess.

Here is the message I wrote on the art website explaining all this:

Spray fix is important for a pencil drawing. However, if you care about your pastel drawings, never, ever spray them. The fixative turns a bright white pastel mark to dull gray. Something about the fix kills the highlights.

To store a pastel, get some shiny paper, such as the kind that glossy magazines are printed on. You can get this from large print shops, probably for free. They use it to get their printing presses ready for a production run. It’s called ‘make-ready’ stock, 80# enamel gloss. Use removable tape and tape the shiny paper to the top edge of the pastel drawing. The pastel won’t stick to the shiny paper…or, at least, not enough of it to matter.

This allows you to view the pastel by lifting – hinging up the protective shiny paper, and then flop it back down when you want to store the pastel. I typically tape two sheets of cardboard together and carry a dozen pastel paintings in my plein air backpacking kit. When I want to frame a pastel, I pull the shiny paper off, wipe it down and use it for another pastel.

Also, when you do go to frame them behind glass, hold the pastel up and smack it sharply on the back numerous times with your thumb. This knocks off all the loose pastel dust. Examine the pastel, make sure it doesn’t need touch up, and then smack it again. Once it’s framed under glass, it’s good for hundreds of years.

If a few pastel specks float down off the painting after framing, they will drop down into the ‘dust catcher slot’ between the pastel and the first matt, which should be about 1/8″.

Appropriate uses for fix on a pastel drawing might be where you have overpainted a section and the paper won’t accept anymore pastel because you’ve covered up the ‘tooth’ of the surface. Your options are:
(1.) to brush the pastel off with a stiff brush like a toothbrush, which gives your paper back it’s tooth, or
(2.) to spray fix on that area, which glues the pastel down and creates tooth from the glued down pigment.

But fix is smelly, and it’s better to use a paper with high tooth (Rives BFK) or one of the sanded papers, and be careful not to overwork the tooth.


Free Solo Movie

Posted by on October 24th, 2018  •  0 Comments  •  Full Article

I just saw the Free Solo movie in a theater this weekend. It’s an excellent documentary style movie about what is probably the hardest, most dangerous human achievement ever recorded on film.

I can’t think of a single dangerous activity and or extreme sport that compares to what he did. Extreme base jumping in a squirrel suit comes close, but even that has some safety margin built in. You can fly away from the cliff and pop your chute early. And you are falling through the air, so peak physical strength is not a requirement.

In any other extreme athletic activity you can name, there is always room for a couple small errors. They won’t immediately kill you. What Alex did has zero room for errors. Oh sure, there were easier sections, but on the crux moves, like that boulder problem, he either nailed it or he died. Bouldering is normally done on boulders, literally 15 feet high, max. And there are piles of landing pads underneath you, with friends to help catch a fall. Alex calling that move a boulder move is strictly for Hollywood effect.

I hesitated to even buy the ticket because I knew I was contributing in a small way toward encouraging him to do more free soloing. As they say in the movie, all the best free soloists have died, with maybe a few exceptions. That guy he was talking to named Peter Croft has been soloing for decades and is still alive. Back in the eighties I used to see Peter every few weeks free soloing routes that I couldn’t even climb with a rope. He was a really nice guy, and would talk with average climbers like me and my wife if we had a question about a route.

We also used to see John Bachar at Joshua Tree every year at Xmas. He would be free soloing hard routes like left ski track. He looked so solid I would have felt safe on his back. As they said in the movie, John is dead now, he fell on a route in his late forties, ropeless.

Alex knows all this stuff. He knows all about our tribe of climbers. Some might consider him one of our leaders, though I’m sure he would scoff at the idea.

While I have tremendous respect for his skill and dedication to achieving his goal. I am troubled by the low value he places on living. We all have our ups and downs. But in general, I really like being alive. I hope to live to a ripe old age. Life is endlessly fascinating to me. I feel like my best years may still be ahead of me. This is in regards to my painting, which is just coming into it’s own in my mid sixties.

But regardless of your hobbies, or lack thereof, life always has something interesting coming around the corner. You might not even know what and or who it is…but it will be worth waiting for.

Alex does not seem to see life that way. He is, in the movie at least, so focused on his goal that he is willing to make that ultra dangerous  boulder move, or die trying. And to me, that means (normal) life is just not that fun for Alex. I could walk away from climbing tomorrow and still enjoy my life.

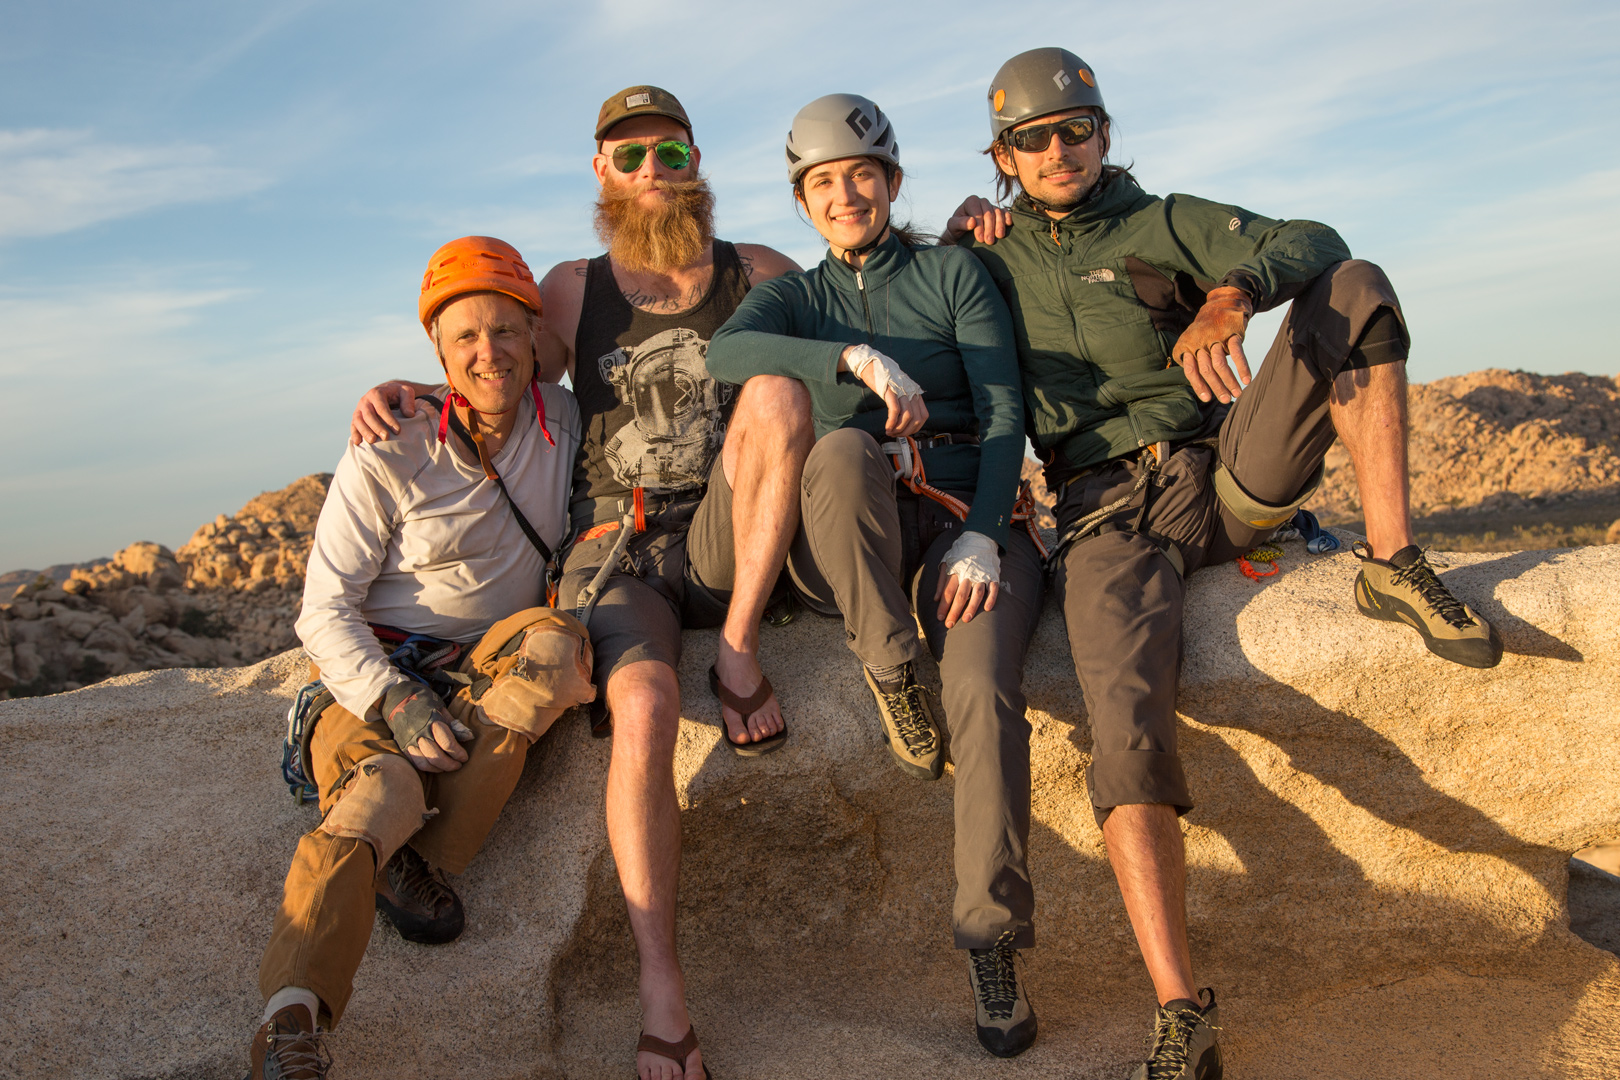
I have my hobbies, my amazing kids and my lovely wife…all of whom are climbers. But we also have other interests. Life is not focused solely on climbing. I love climbing, it’s the best sport in the world! But I’m intimately aware that it could kill me at any time. One small lapse in judgement and I could die. And I climb doing it the “safe” way, with ropes. But there is still plenty of danger. We try to minimize the danger as much as possible. But at a certain point, you have to just say: “These rap anchors held the last party as they rapped down, why would they fail on me?”

Some of the above words may sound like I’m passing judgement on Alex. I don’t mean to do that. We each get one chance at life. I’d like mine to be long, gosh, I keep hoping I’ll have time to finally get it right. Alex is different. He has goals, and he achieves them…so far. I have no right to tell him, or all the other free soloists and base jumpers how to live their life.

I do however feel sad for them. Life is a grand adventure. It stays good for a long time, it’s still good for me, and I’m twice Alex’s age. To be his age and already be willing to give it all up for a silly rock climb that you want to do without a safety rope. It just strikes me as sad.

Addendum:

On a side note, I should mention that I have done some free soloing. Back in my twenties Paul and I used to free solo some short sixes, and even a short 5.9. I was young, bold and dumb back then. I’m not proud of it, but it did happen. Even today, there are approaches to rock climbs that come close to free soloing. It would take too long to get the rope out so we simply “scramble”, knowing we are unlikely to slip. We call it dangerous hiking, or “approach pitches”. But most of the time a fall would not kill us. We’d break some bones…and spend some time in the hospital…so we tread very carefully.

I like to think that the kind of climbing I’ve done for 40 years can be compared to driving a car in bad weather at 60 miles an hour on a two lane road. One twitch of the steering wheel and someone could die. So we try to stay very focused on safe driving…and hope the other guy is doing the same. 37,400 people die in the US every year driving cars.

When climbing with ropes, we normally have layers of safety. If we slip, the rope will catch us. If we bang our head, we have a helmet on. If some of our gear rips out, we have more gear to back it up. If we think the climb has become too hard, or it starts to rain or gets dark, we build an anchor and rappel down. We are never faced with an all or nothing situation: Do this move cleanly or die right now. I value life too highly to get in that situation. I hope Alex gives up free soloing and lives a long happy life. He should have plenty of money now after this movie takes off.


Preparing for a show

Posted by on October 22nd, 2018  •  0 Comments  •  Full Article

Two weeks ago I needed 6 new frames for a one day show. Because I couldn’t afford to buy them I reasoned this was a good time to learn to make frames from scratch. Usually I go to Michael’s and buy pre-made frames. I paint in standard sizes  of 9 x 12, 12 x 16 and 16 x 20 precisely because those are easy to find pre-made for under $50 each. However, if I could figure out how to make frames from raw wood, I could get the cost down to five dollars a frame.

Dewalt table saw

Dewalt table saw

I bought 1 x 2 pine from Lowes and drove over to my son’s house to borrow his table saw. To put a picture in a frame, the frame has to have a slot in the bottom. It’s called a rabbet, and allows the frame to overhang the picture, covering up the edge of the painting. You basically have to take a notch out of the bottom inside corner, and it needs to be about 3/8″ inch deep.  This required two long cuts on each board, that met in the middle exactly.

cutting the rabbet

With the rabbets cut I took the  boards to my house where I have my son’s other saw, a miter chop saw. I cut the 45 degree angles then glued and nailed them together. At the time I didn’t have corner clamps and chose to use a very old system of hammered wedges  to pinch the corners together for gluing. Trouble was, hammering in the nails would knock loose the wood wedges. And if not that, then the wedges wouldn’t hold the corners true. The trueness problem

Clamping with wooden wedges

Clamping with wooden wedges

was related to me not cutting the wedges square. I cut them with a hand jig saw, which wasn’t accurate. I did 6 frames with those wedges, but they  needed a lot of work afterward. I had to sand off alignment issues of up to 1/16″ on the corners, plus  a lot of wood putty work to fill gaps.

After assembling I had to stain them in 3 coats. And this was all while teaching during the week. I calculated afterward that I worked 8 days straight, up to 16 hours a day. At the end of that period I was so frustrated with the wooden wedges I drove up to Rockler woodworking in Tukwila and bought two professional framing clamps.

finished frame and a pro corner clamp

The show was Saturday from 2 to 6 pm. It was billed as a wine tasting event. They sold out at 270 tickets and it was packed from 2 to 4ish. I mean the room was literally jam packed to the point that people were waiting in line out on the sidewalk. They had 10 artists in 10 different businesses. The tickets allowed people to walk from location to location and get wine samples by presenting tickets which they received in a roll from the event organizer.

My 6 paintings were hung in a financial planners office. Both he and the wine dispenser guy were doing an awesome job of ‘working the crowd’.  Those guys were pro’s.  In contrast, I seemed to be most comfortable leaning against the wall, like a shy wallflower at the prom. It’s odd because I love teaching, and enjoy  helping my students. I did talk to some very nice people who complemented my paintings, and we had brief conversations about painting. But nothing sold. I talked to another very talented artist from across the street, and she confirmed the same experience.

As the crowd of tipsy wine tasters streamed by I kept thinking about the high alpine meadows or quiet vistas where I had created the paintings. I’m at peace in those places. But in a busy crowd of strangers in the city, where everyone is drinking wine and having fun…it’s hard to explain. If I’d had the money I would have bought a ticket and sampled some of the local wines on display, maybe loosened up a little. The wine guy who was next to me  runs a one man wine making shop in Lakewood. I asked him how he got the ‘gift of gab’ and he commented that it is a learned skill. Perhaps some day I’ll figure it out, but, that’s all water under the bridge.

I was thinking about starting another painting today, but yesterday I saw smoke coming out of the hood of our 1991 Corolla. I was afraid the poor old thing was going to catch fire and blow up. On popping the hood I saw a huge crack in the radiator. This will be the second time I’ve had to replace the radiator in that car. It’s about a 5 hour job for a back yard mechanic. Guess I’ll paint another day…

Easter Overhang and painting leather

Posted by on October 9th, 2018  •  0 Comments  •  Full Article

C, V and I climbed Easter Overhang Saturday. When I did it 7 years ago with Fletch I led it almost clean and loved it. Fast forward to last weekend and I was a different man. I could barely follow it. I fell out low down on the 5.8 layback, I just couldn’t figure out the move. My feet weren’t sticking in my new Scarpa shoes. Then I ran out of power at the roof move and fell out backwards, landing upside down over 300 feet of exposure. At that point I started grabbing gear and clipping my daisy into the cams to rest. I asked V if I could leave the backpack I was towing to make myself lighter. I was out of gas, and seemed to have forgotten how to climb. I was sort of watching myself flail and thinking: “Dude, you are better than this…snap out of it!”

Finally I got thru the move into the upper chimney. I got stuck there for a while until I realized you have to move out where it’s wider to get some kneebar action. Other than the obvious reason: I’m in my mid sixties now…here are my excuses for climbing so badly.

  • I can’t afford the gym anymore, so I’ve got weak forearms
  • I was climbing in some brand new Scarpa’s, which I’d just finished rebuilding. They felt like wooden shoes and need to be broke in
  • I’ve been focusing on slab climbing due to rain on Castle the last few weekends…I barely got up Classic Crack recently.
  • I’ve been painting more than climbing all summer.
  • I’ve been dieting hard this week, trying to stay below 170 which creeped up on me.
  • I might have got real old, real fast?

Lisa bought me a turban squash. It’s looking pretty good. My main problem with stilllifes is composition. This may be the first time I’ve nailed a good set up. Painting leather is super fun. Brown has always been a problem for me. It’s like green…I just can’t paint it pretty. But this one might be a break through.

A wedding, a helicopter, two paintings and 3 bears

Posted by on September 30th, 2018  •  0 Comments  •  Full Article

waiting for the helicopter

waiting for the medevac helicopter

Sue, Lisa and I went to Paradise today. I dropped them off at Reflection Lake. They hiked up to Pinnacle Saddle, then 5 miles across to Paradise to meet up with me. Meanwhile I hiked up to the Skyline trail where the mountain was hiding behind a cloud cap. I set up to paint, hoping it would clear out, but when it didn’t I flipped my easel the other way and painted the fall colors on the meadows.

When that was done I packed up and hiked up to Glacier Vista below Panorama. I got out my partially finished painting of Rainier from 3 weeks ago. The top and middle of the mountain were done, but not the bottom and sides. I began working on that as the clouds continued to drift on and off the summit.

Because I was on my second day of painting, it was looking pretty good and I began to have a lot of hikers, climbers and tourists stop to take pictures of me working. At one point a cute little girl of about 8 walked right up to me:

“I like your painting, you are a really good artist!”

I thanked her and turned around to see a huge crowd completely filling the viewpoint. There were maybe 15 people, all holding up their phones filming me, or staring in wide eyed wonder at the painting.

I took out my earbuds and they started in with the questions:

“How long have you been working on that?”

“Do you sell your paintings?”

“How long have you been an artist?”

“Is that oils or acrylics”

“Are you a professional?”

“Do you have a business card?”

They seemed quite dumbstruck with the whole thing. I’ve never  had that many people like my work before. Its odd because I don’t think the painting was that much better than some of the other work I’ve done this summer. Perhaps it was just a busy day at the park. I suppose it was partly because my painting showed the whole mountain, but if you had just hiked up there, you could only see the bottom. They might have wondered how I painted something that wasn’t there.

no mountain no problem

no mountain no problem

I was perfectly happy with only the bottom of the mountain showing because that was what needed finishing. Anyway…all those people left, but they were soon replaced with smaller groups, all of whom seemed to like the work. By 4:30 I was loosing my light so I packed up and headed down.

Just as I was approaching the y split to the Alta Vista trail a helicopter passed quite close overhead . This always means a rescue and sure enough it landed right in front of me, about 200 feet down the trail. I saw Lisa’s ranger friend down there signaling the pilots and doing crowd management. He couldn’t let us pass until the helicopter had lifted off.

I waited with the crowd for a 15 minutes thinking it would take off. But soon the ranger told us to go back and take a detour trail. Unfortunately that was up a steep trail with stone steps, and I groaned at the thought of going back the wrong way. But soon I was on my way again…until I ran into a bunch of guys in tuxedos. And a film crew. It looked like an expensive wedding. There were at least 5 photographers and video people, even a sound guy.

I didn’t see the bride and her ladies in waiting…until I walked a mile further down the trail…and there they all were, sweating from the steep trail up from the parking lot. And it was getting dark, with threatening rain clouds coming in. Some of the old people coming up the trail in suits looked like they were on the way to a heart attack. Right before I arrived at the parking lot I ran into a huge group of tourists pointing cameras into the meadow. I couldn’t see the bears, but Sue and Lisa had watched the mom and two cubs for half an hour. They must have been just off the trail based on the excitement in the crowd. I felt sorry for the poor animals. They probably could sense the chaos and just wanted to eat some blueberries.

That was not your average trip to Paradise. I will post the paintings later after I’ve had time to review them. I’m hoping they are both good, but I’ve often been disappointed pulling paintings out of my backpack.